Sobel Edge Detection
Rust is a systems language pursuing the trifecta: safety, concurrency, and speed. This makes it well suited to machine learning and data science tasks. Rust experience will not be required, only existing programming experience.
We'll spend half the session on a with an introduction to Rust and the rest using functional programming style to develop a machine learning primitive called Convolve which can be used for many tasks including edge detection, sharpening, blur and more.
Our main goal will be the Sobel operator. In a Sobel operator pixels in an image are 'convolved' with the Sobel kernel to produce an output that highlights edges.

Convolution is an incredibly common machine learning operation and maybe you'll walk away understanding a little more about whats going on in convolutional neural networks.
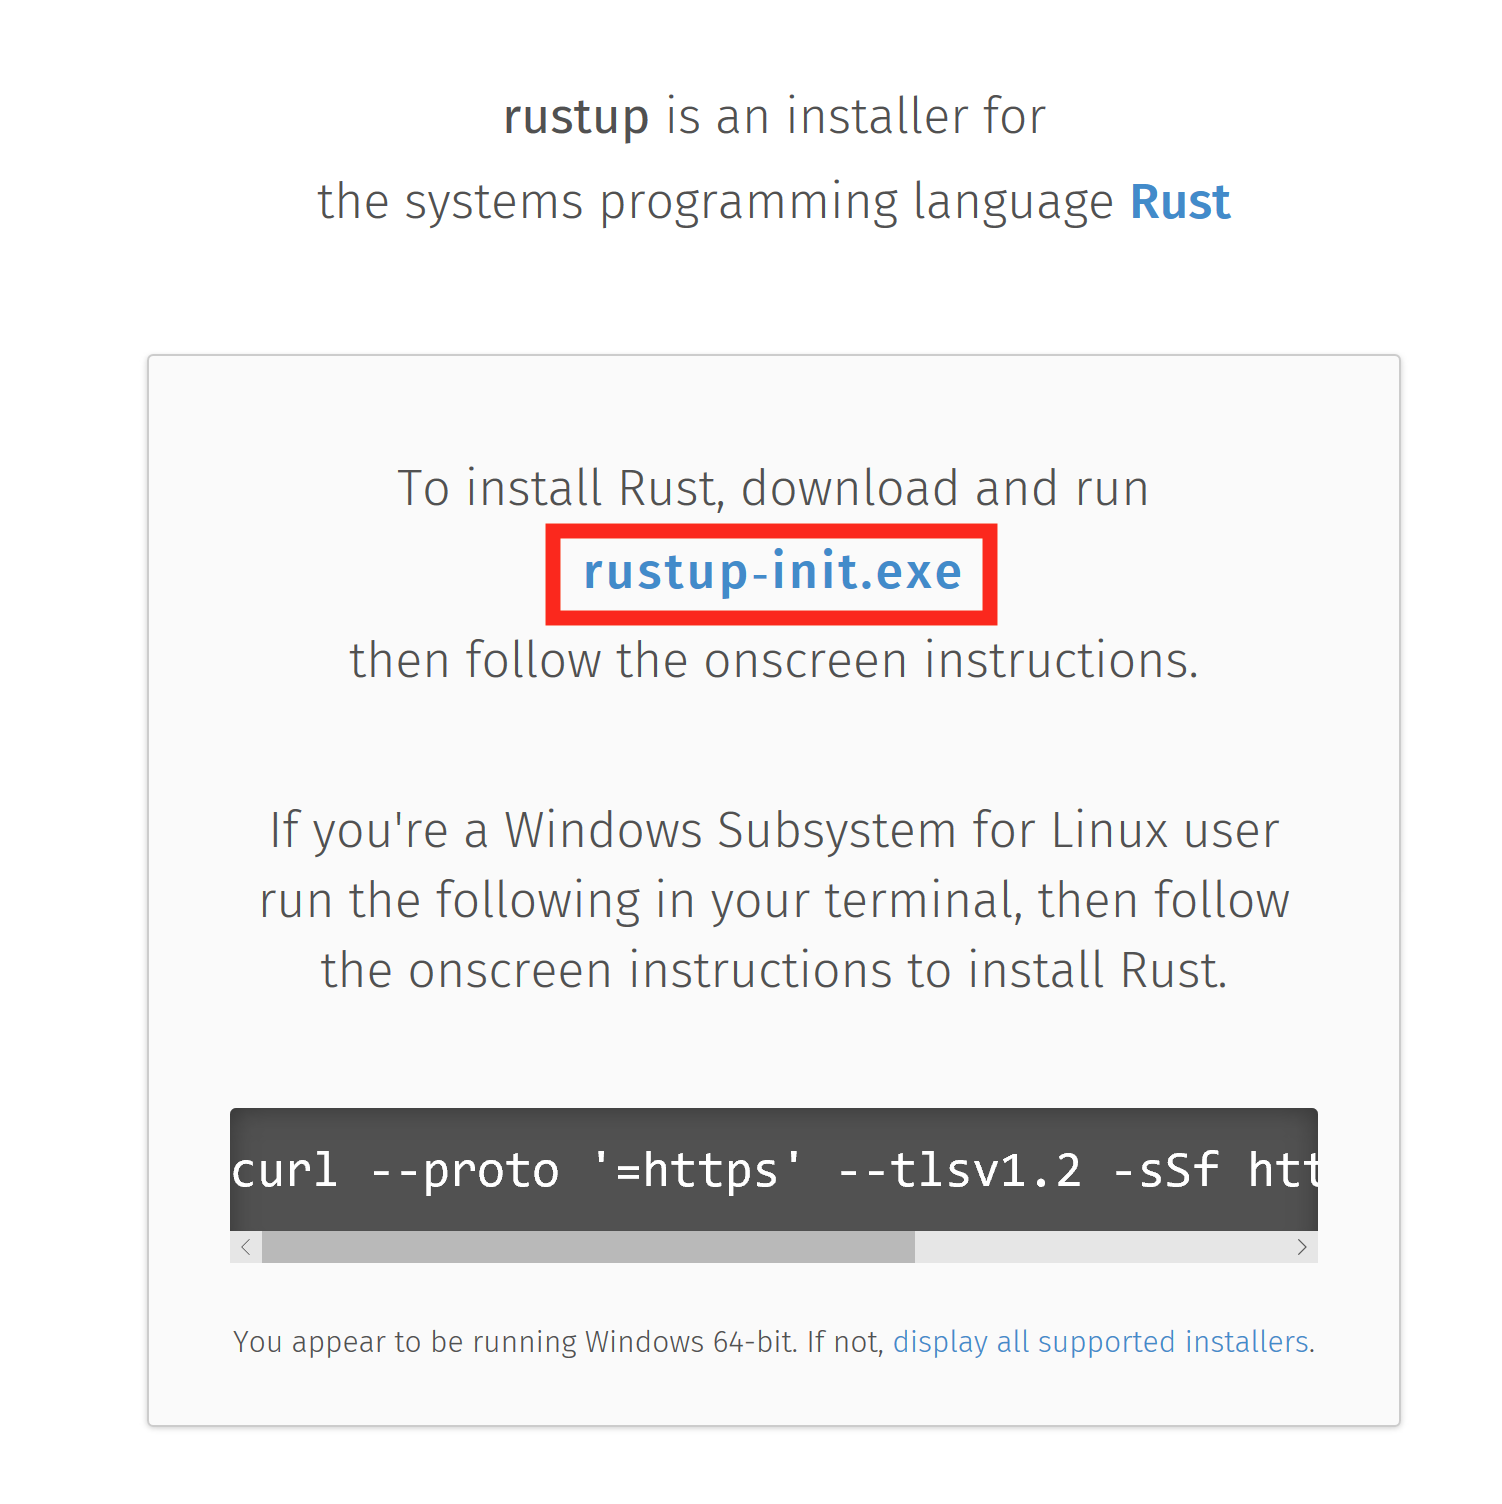
Installing Rust with Rustup
-
Visit rustup.rs, download, and then run rustup-init.exe
-
Make sure you have the dependencies met. The Rust installation includes the Rust compiler, but Rust uses the system linker to create the final executables and link to system shared libraries (DLLs). So, we have to make sure a usable linker and system libraries are installed.
- If you already have one of the listed Visual Studio versions installed with C++ build tools, the dependencies should be met already
- If later you get an error about "Link.exe", follow step 2
- Otherwise, install these:

- If you already have one of the listed Visual Studio versions installed with C++ build tools, the dependencies should be met already
-
Press
1and thenenterto proceed with the installation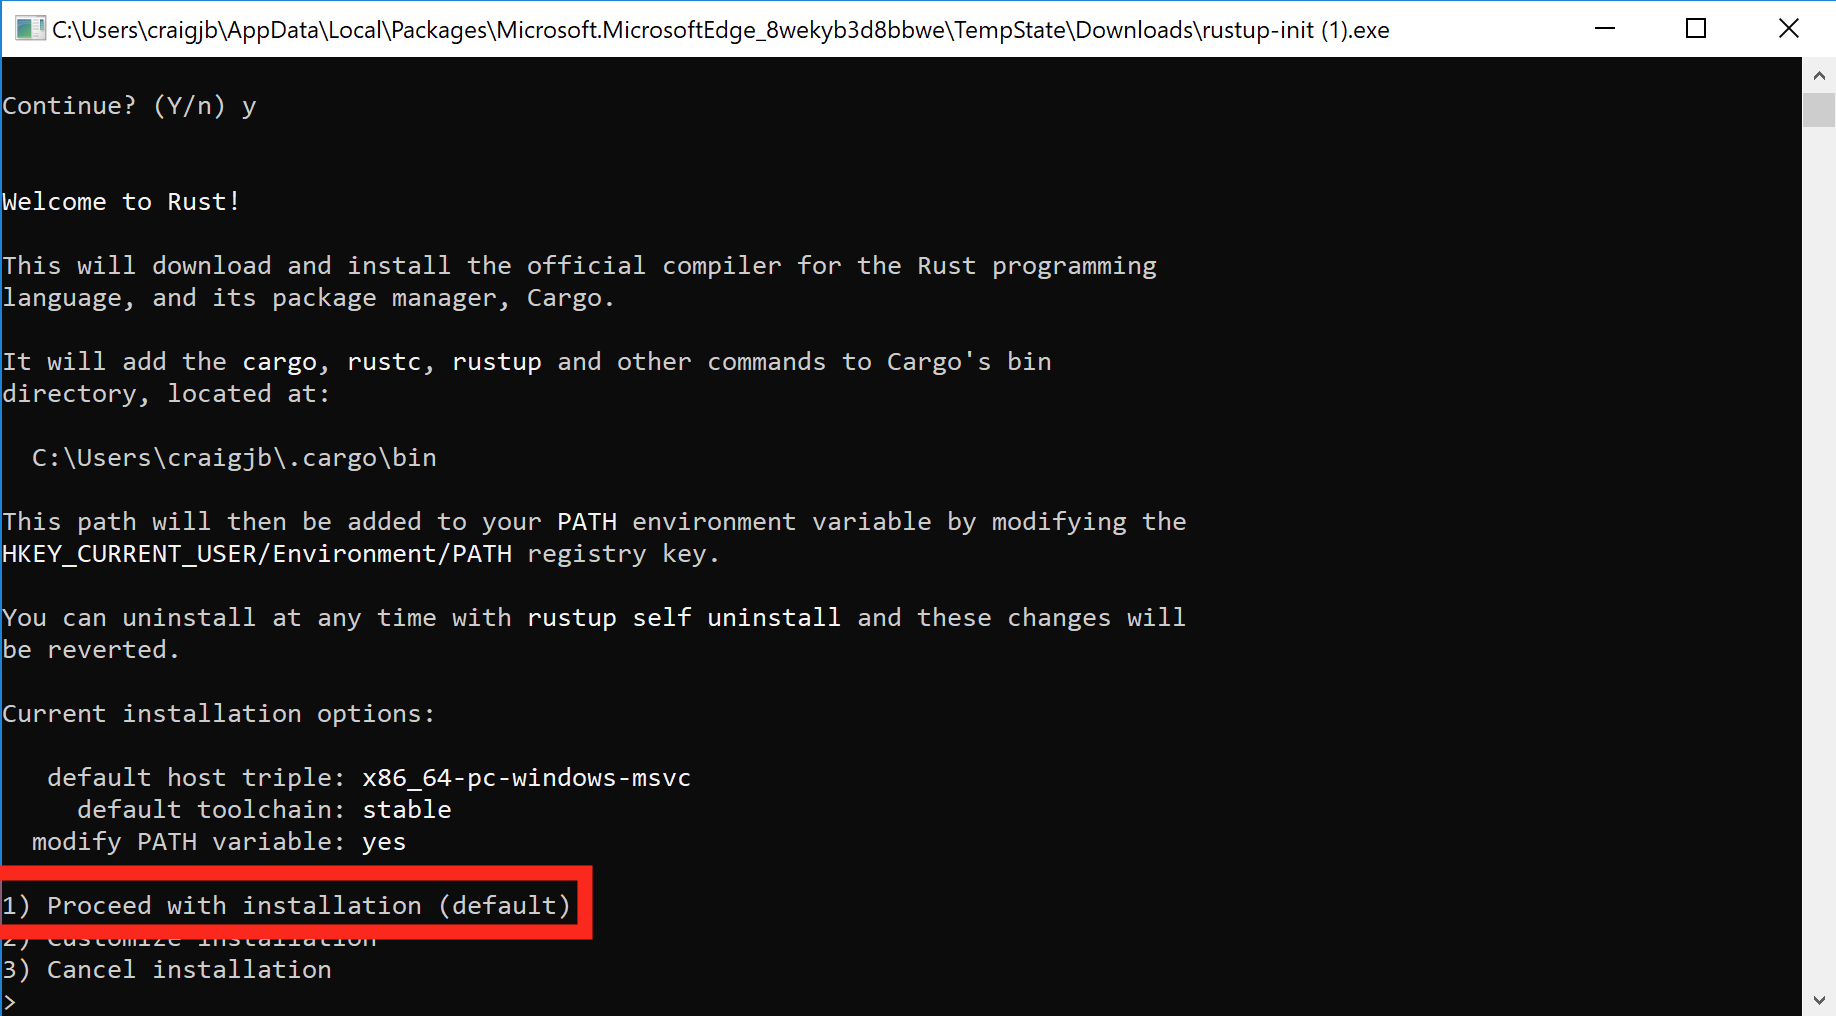
-
Once the installation is complete, the below message should show. Press
enterto close the window.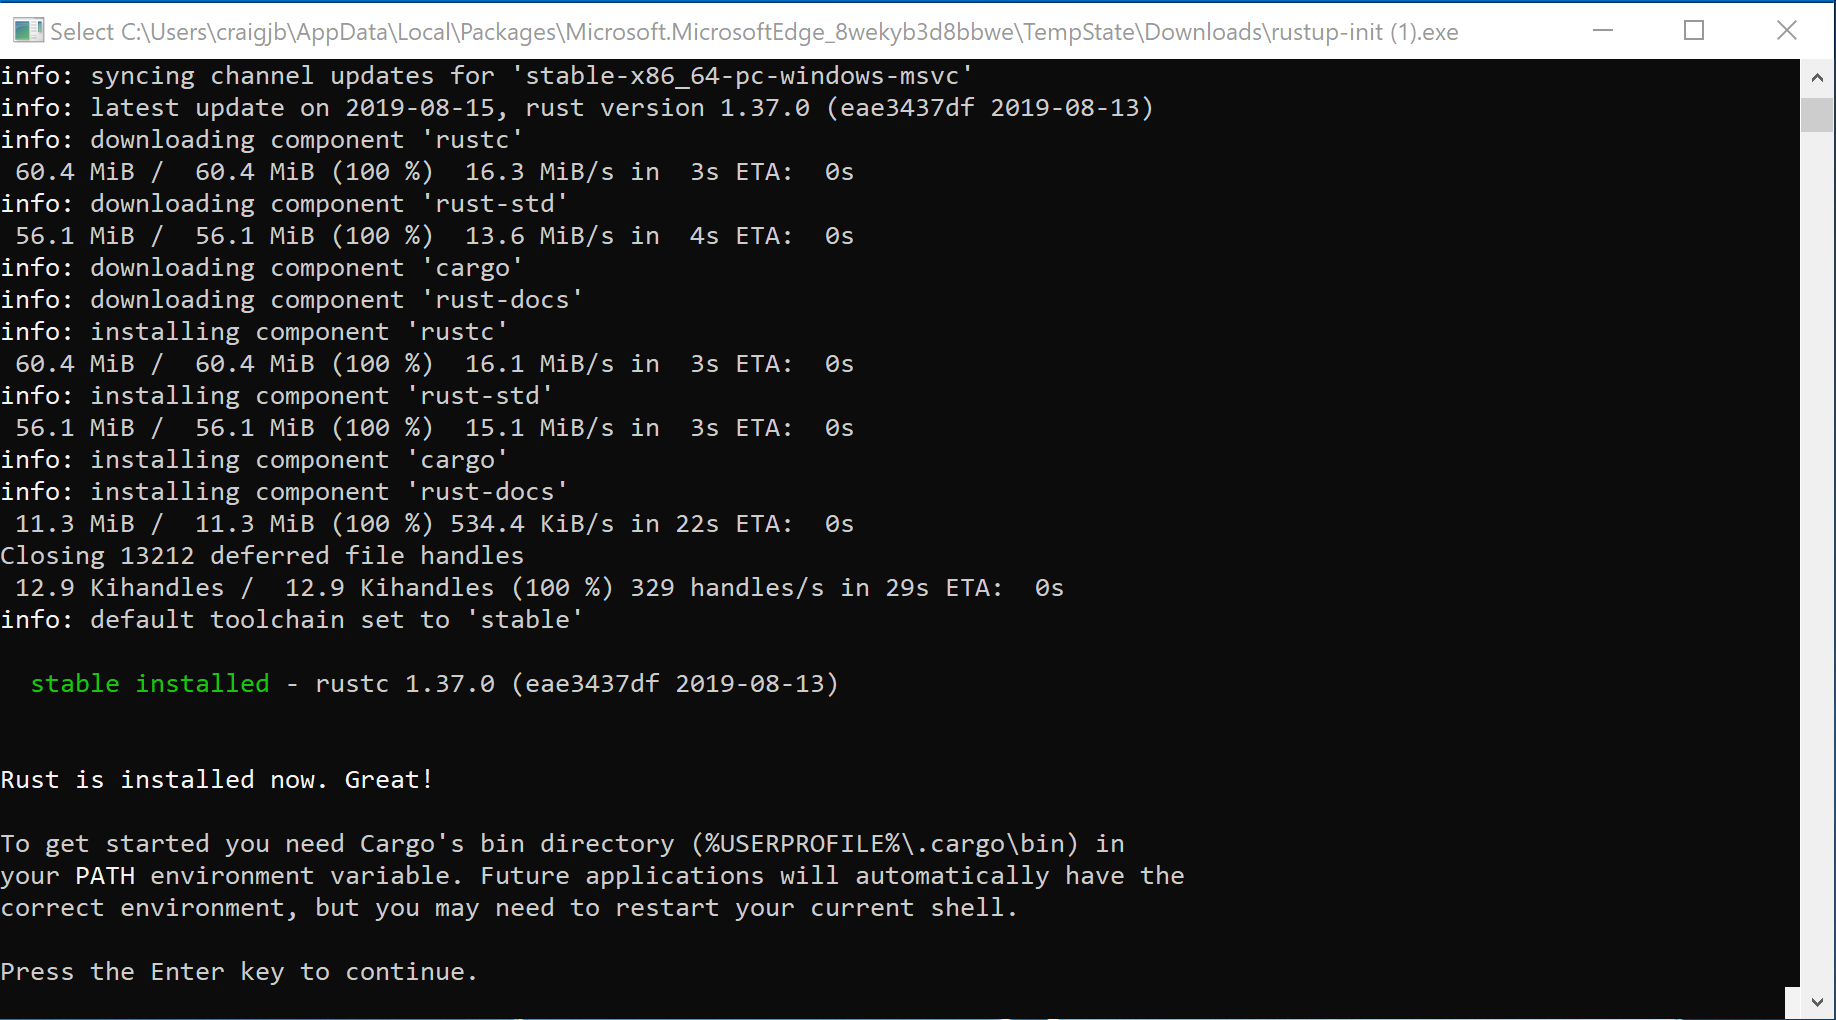
-
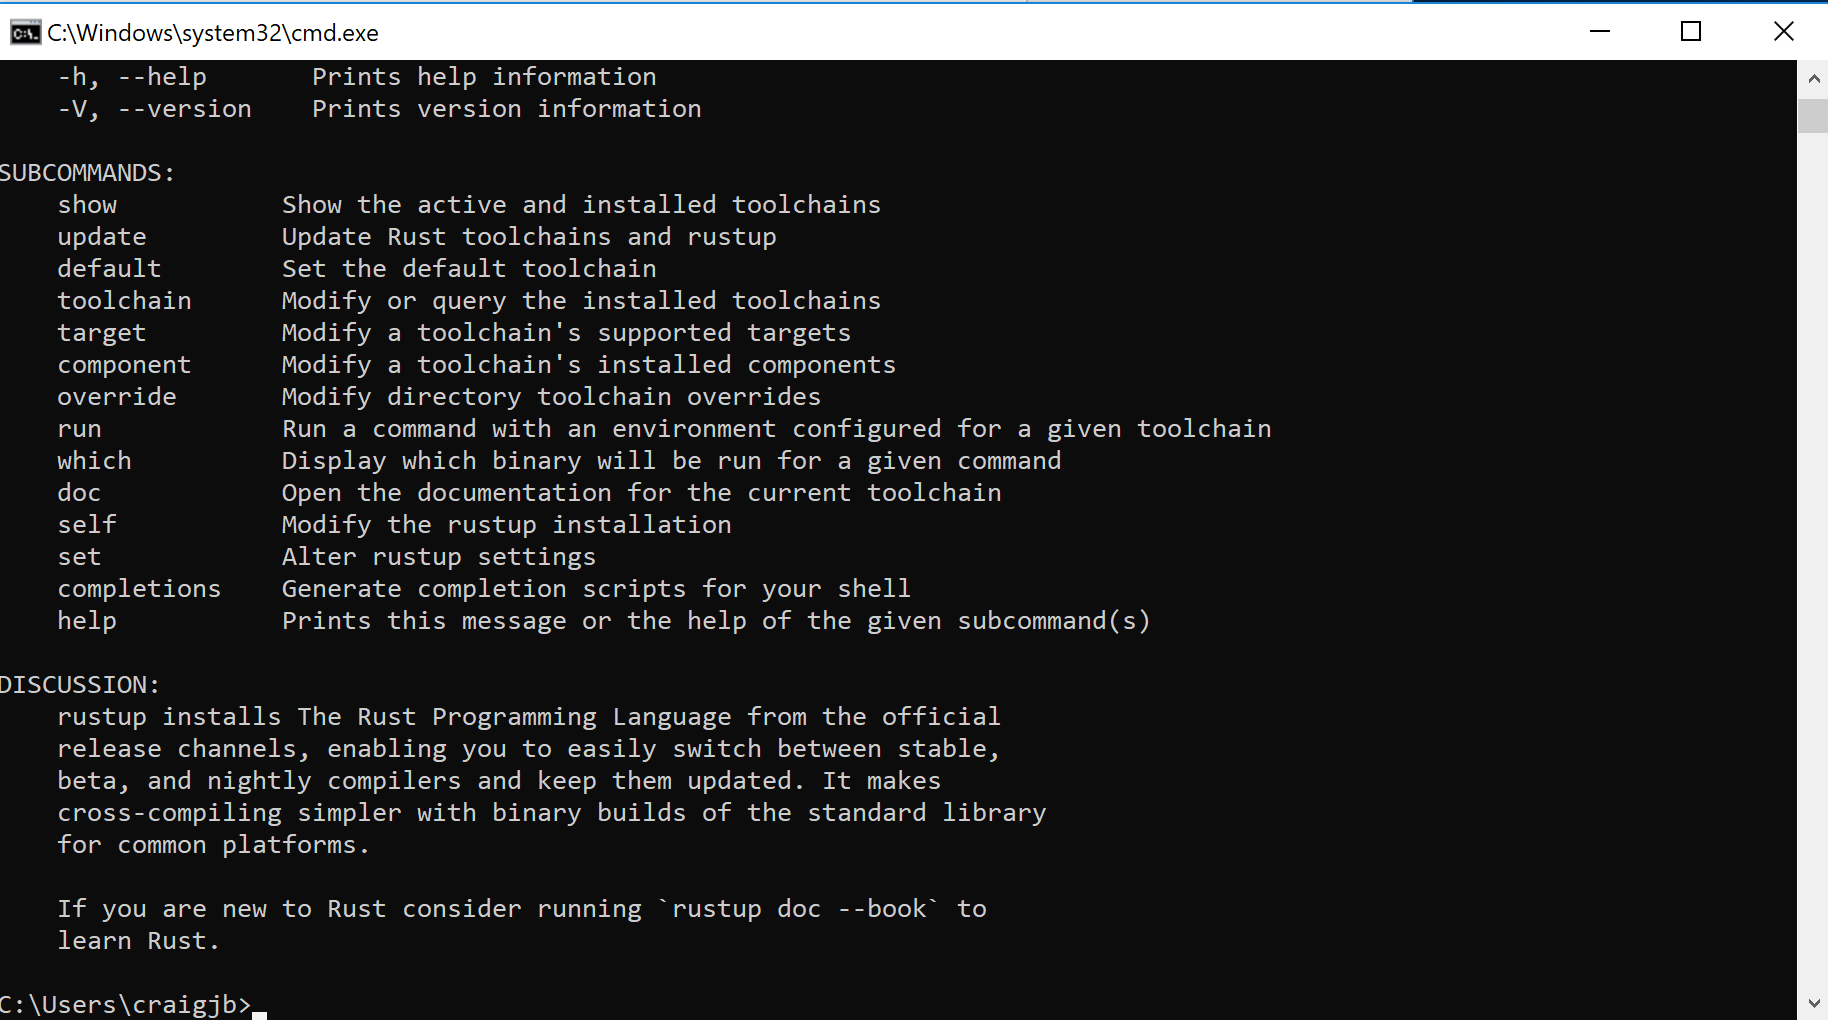
Test the rustup installation:
- Open a new command prompt window
- Run the command
rustup. The command should show help information.
- If the
rustupcommand fails, add%USERPROFILE%\.cargo\binto yourPATHenvironment variable.
-
Install the Rust Language Server (RLS):
- Open a command prompt window (you can reuse the same window)
- Run the command
rustup component add rls. The command should download and install the RLS.
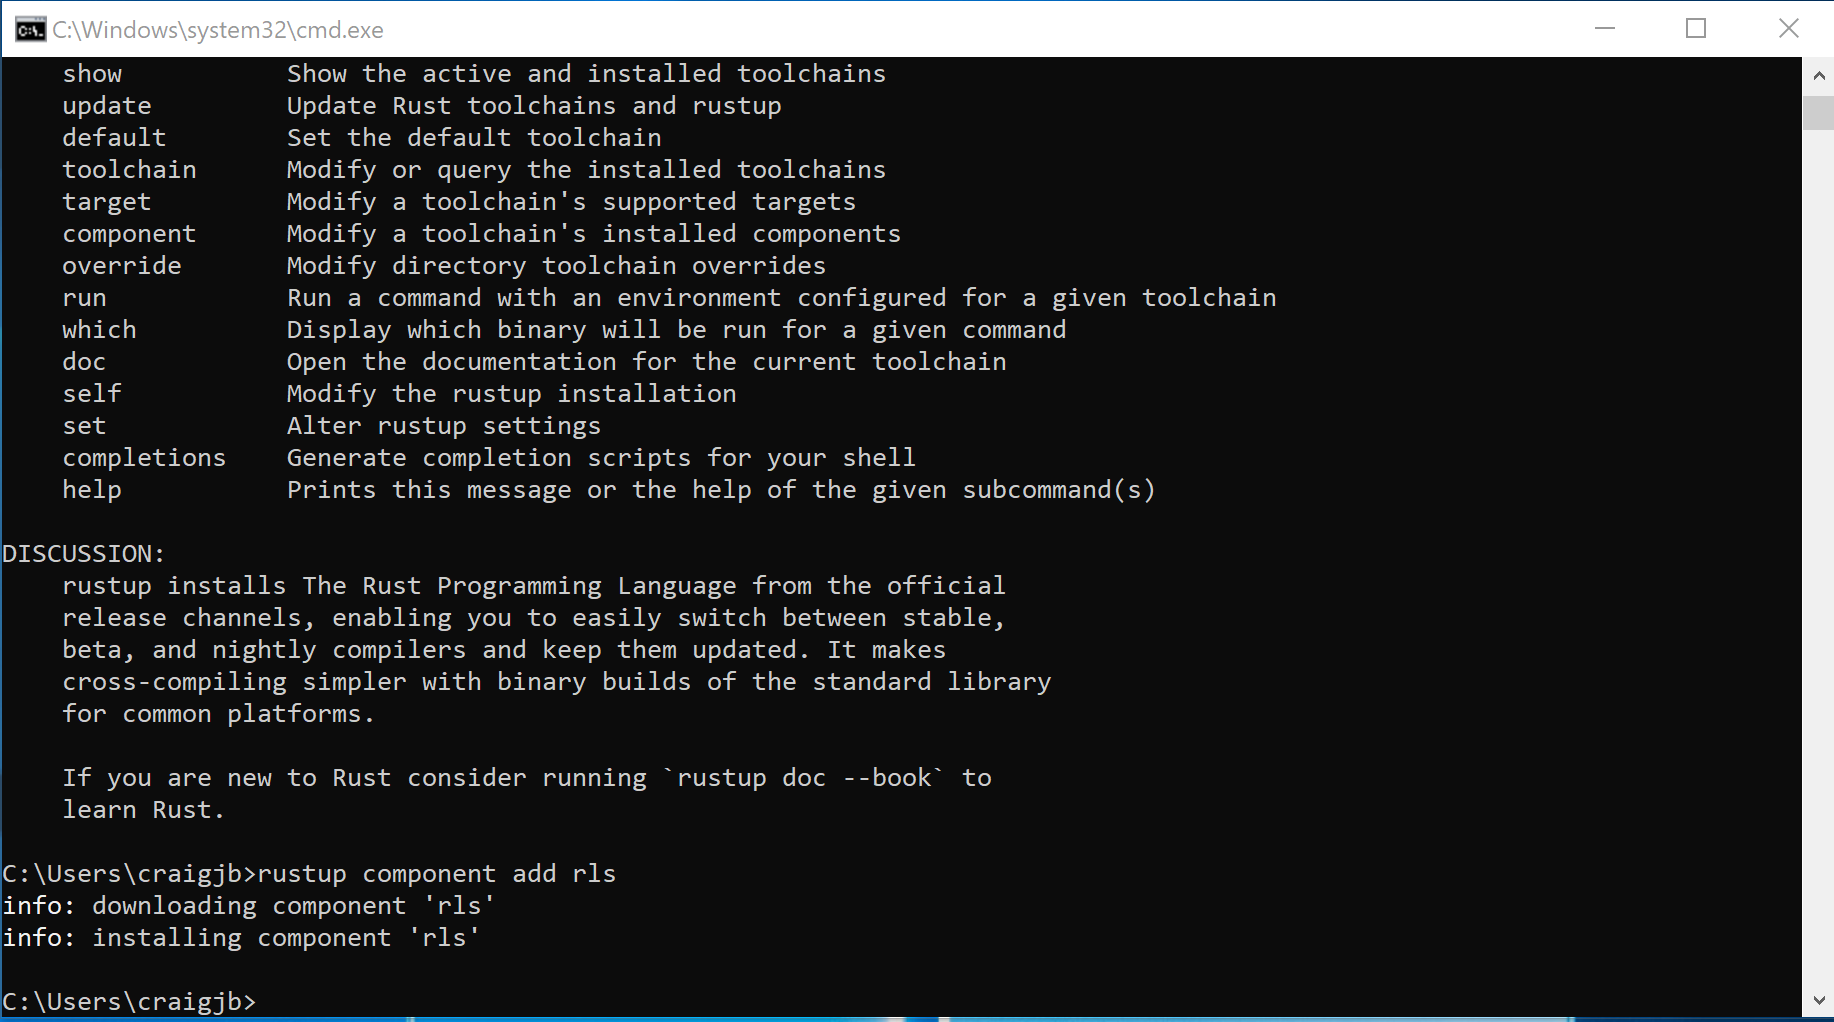
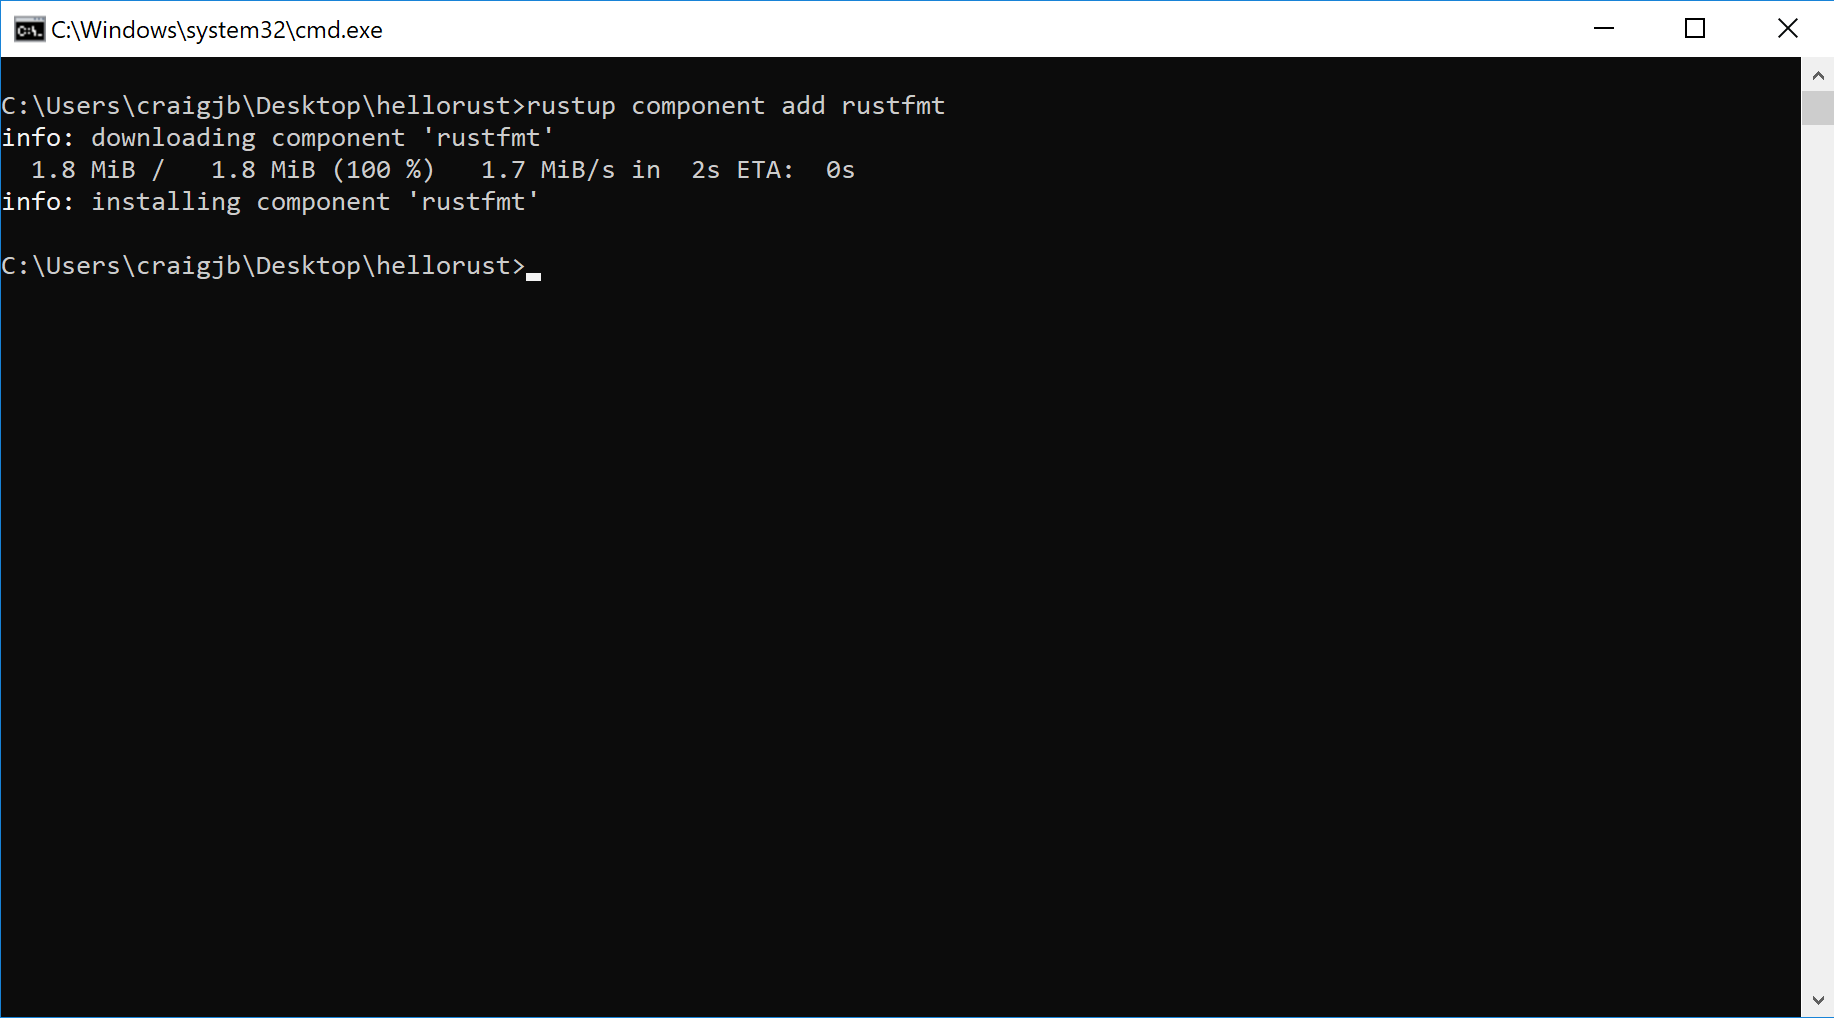
- Install the rustfmt component by running the command
rustup component add rustfmt
Choosing your editor
You only need one of the following editors, or another if you prefer a different one, but the goal is for you to have RLS and Code Formating (rustfmt) installed and enabled.
Configuring GVim 8.x for Rust with the RLS
The steps below configure GVim 8.x on Windows to support Rust and use the Rust Language Server (RLS) for autocompletion.
- Make sure you have a working Git installation. (Download Here for Windows)
- Visit https://rls.booyaa.wtf and follow the steps for your preferred Vim package management strategy.
- Modify your vimrc to include the below snippet. The guide linked in the previous step is still configured to use the Rust nightly build, since the RLS used to only be available in the nightly builds. RLS is now available in stable, and we installed stable Rust (the default). The below snippet should replace the one from the linked guide, and changes the 'cmd' to use stable instead of nightly.
if executable('rls')
    au User lsp_setup call lsp#register_server({
        \ 'name': 'rls',
        \ 'cmd': {server_info->['rustup', 'run', 'stable', 'rls']},
        \ 'whitelist': ['rust'],
        \ })
endif
-
Make sure
filetype plugin indent onandsyntax enableand lets add format on save as well likelet g:rustfmt_autosave = 1 -
Restart GVim or reload your vimrc
-
Open a Rust file and test our autocompletion (for example start typing
use std::)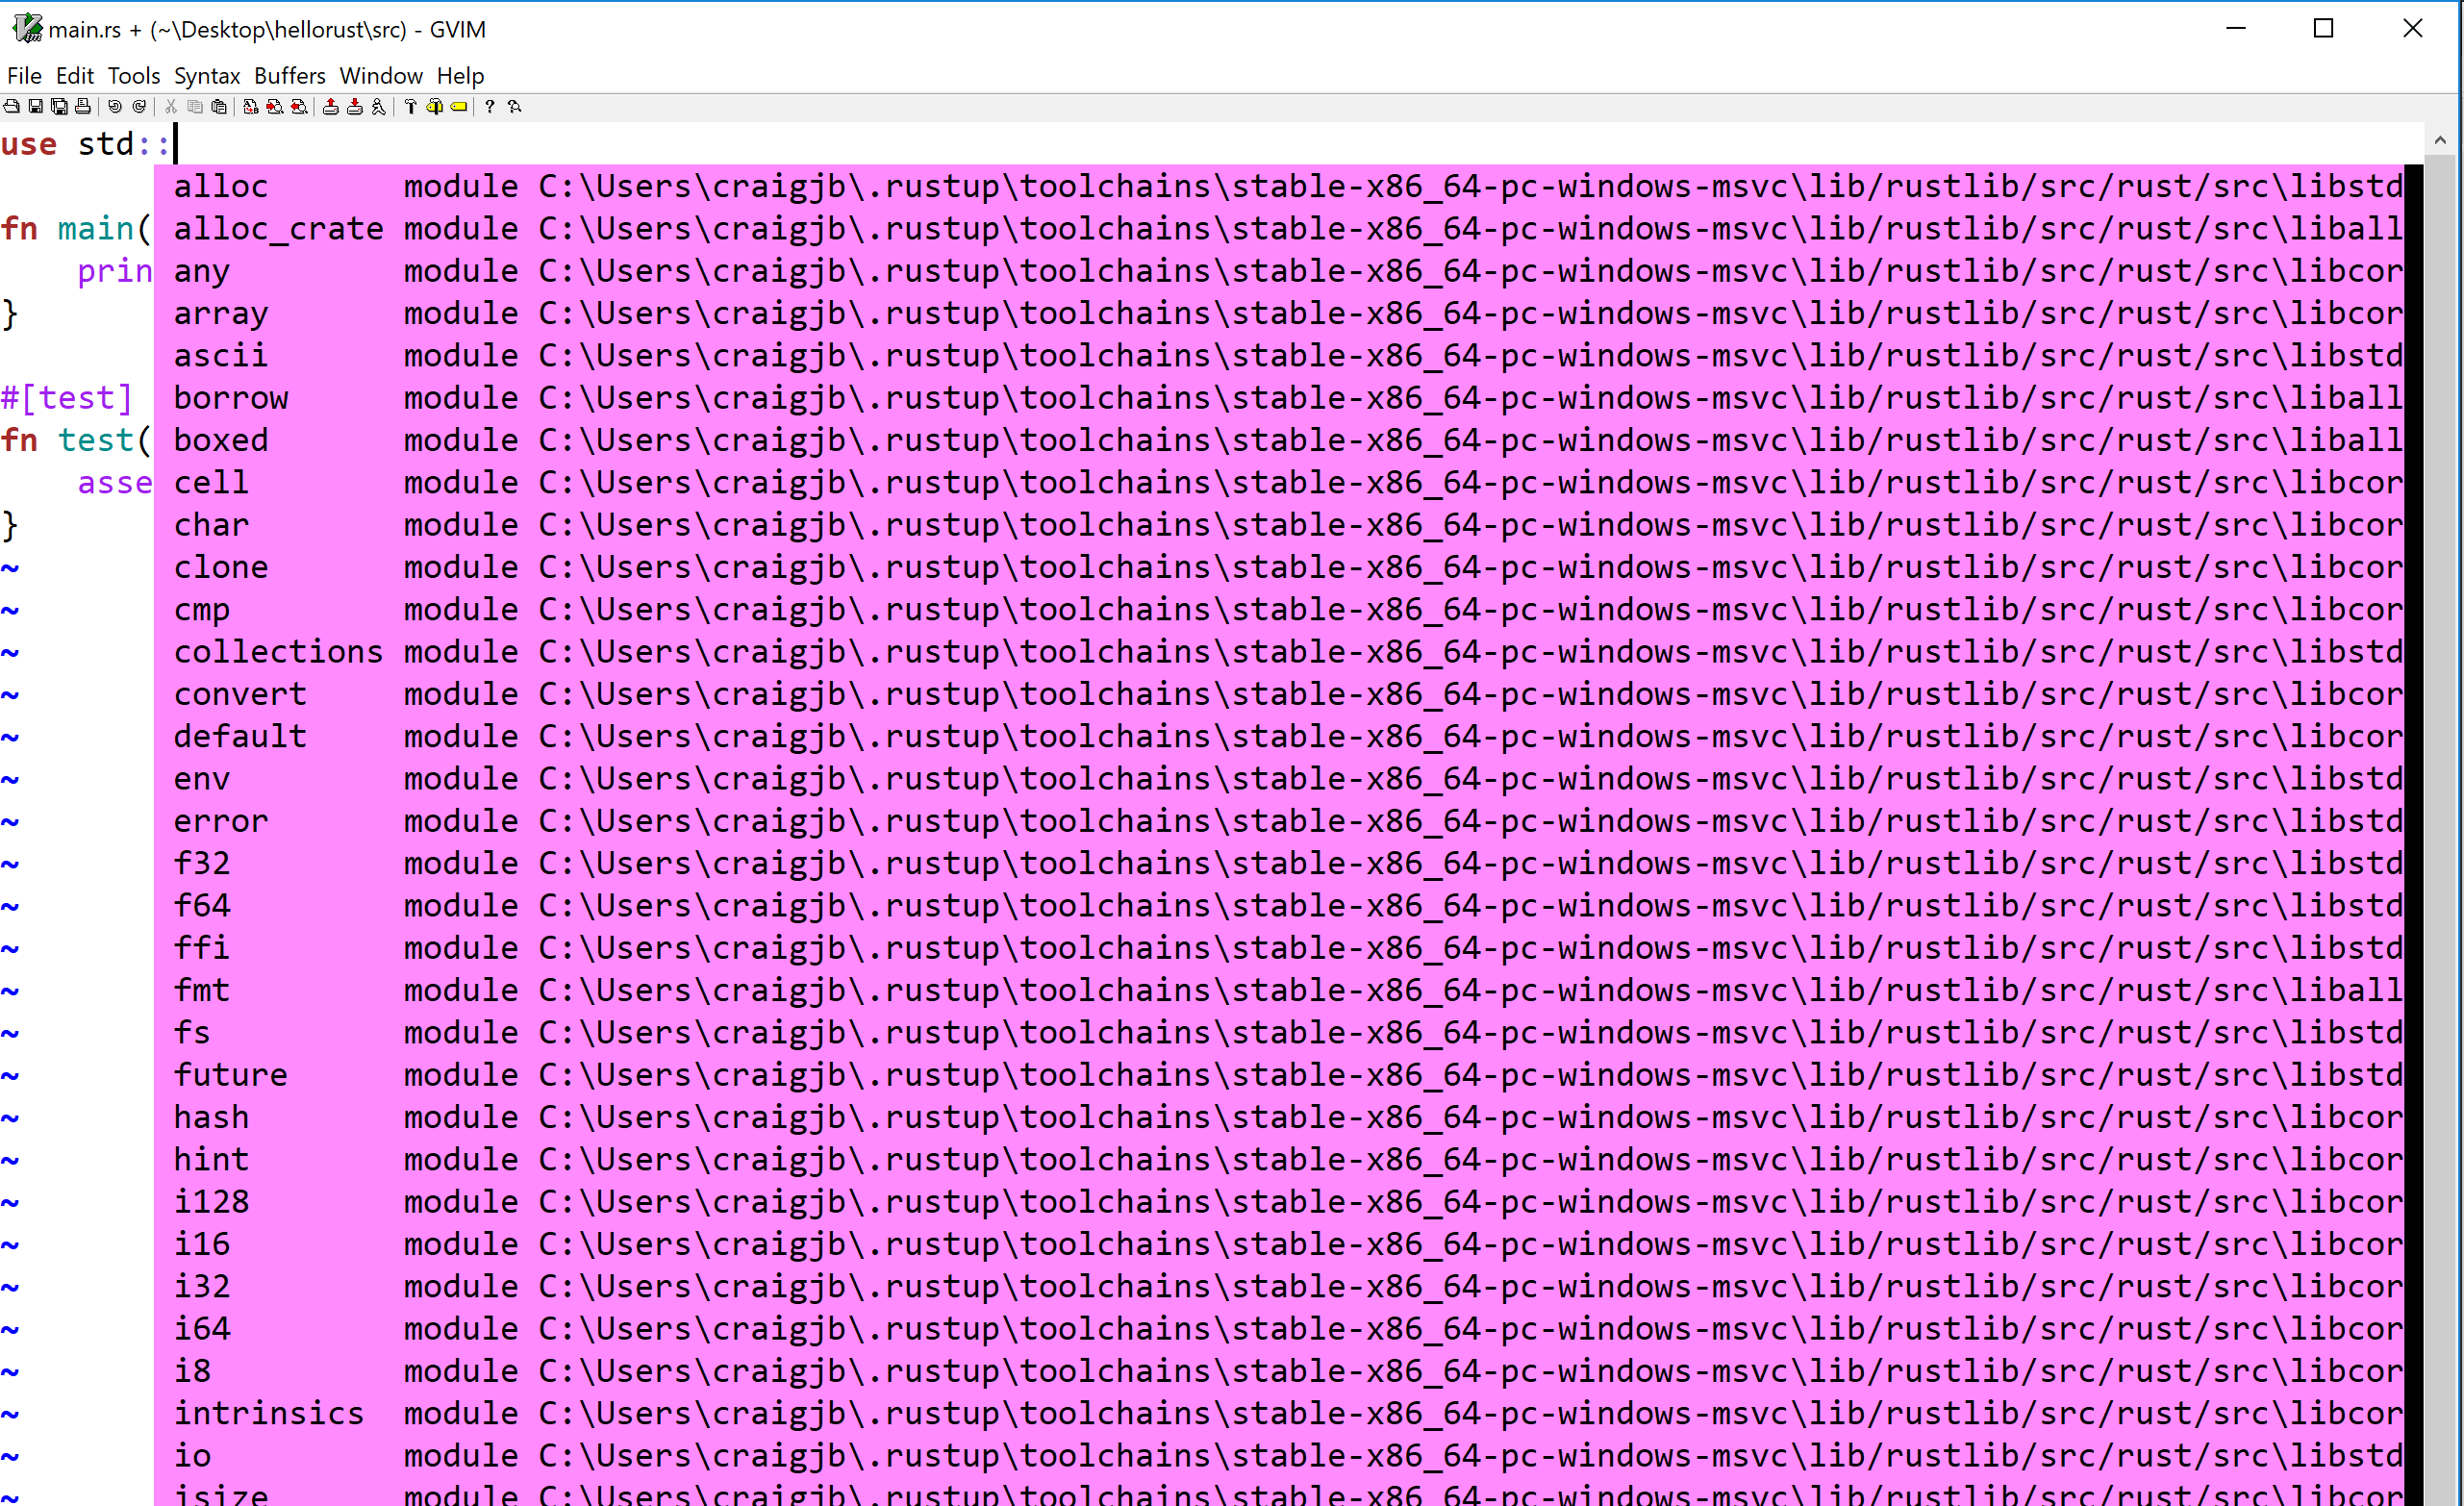
Configuring VS Code for Rust with the RLS
The steps below configure VS Code on Windows to support Rust and use the Rust Language Server (RLS) for autocompletion and incremental compilation to display warnings and errors.
-
Install the Rust (rls) extension by user 'rust-lang' in VS Code. There are several other plugins, but this one is the most maintained.
-
Reload the window in VS Code, or restart VS Code
-
If you see an error message that the RLS could not be started or that the extension could not find rustup, then you will have to configure VS Code's path for rustup:
-
Open VS Code preferences and navigate to the Rust extension preferences
-
Modify the rustup path to use an absolute path to your installation:
C:\Users\<username>\.cargo\bin\rustup
-
Reload the window in VS Code, or restart VS Code
-
You may see a prompt in the lower-right to install the RLS. If so, click yes.
-
-
Open a Rust file and test out the RLS:
- Try autocompletion (for example start typing
use std::) at the top of a file - Try the incremental compilation (for example
println!("Hello, world!") blah blah 42 42should show an inline error)
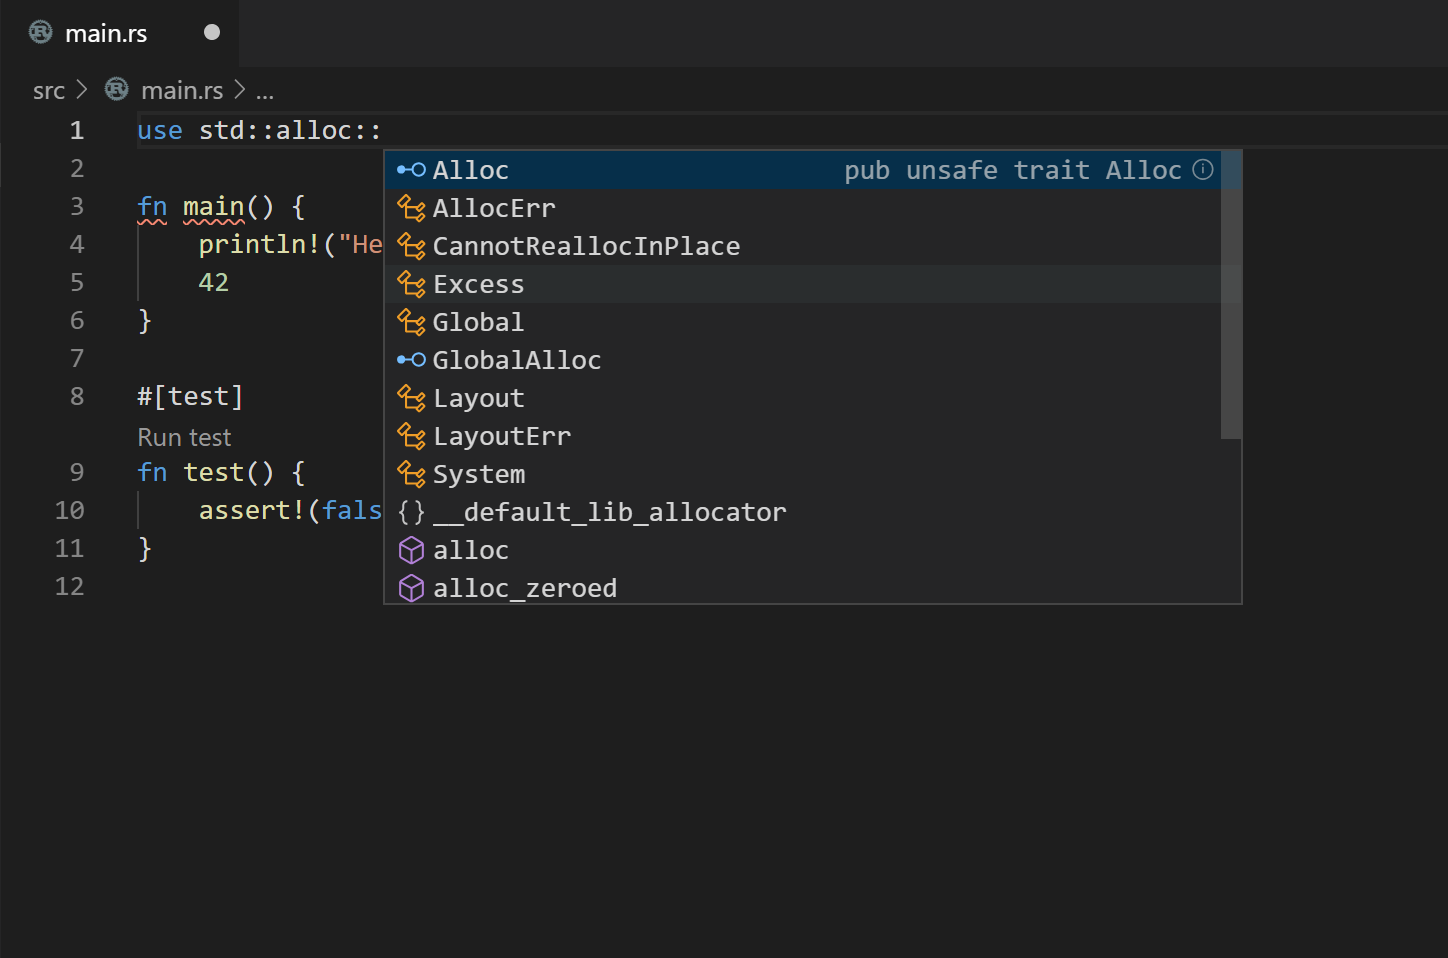
- Try autocompletion (for example start typing
-
Enable format on save in VScode settings. Code->Preferences->Settings->Text Editor->Formatting->Format On Save
Installing Rust with Rustup
- Visit rustup.rs, to install the rust toolchain.
Choosing your editor
Whatever editor you choose, the goal is for you to have RLS and Code Formating (rustfmt) installed and enabled. VSCode is a mature and populare solution for Rust.
Configuring VS Code for Rust with the RLS
The steps below configure VS Code on Mac to support Rust and use the Rust Language Server (RLS) for autocompletion and incremental compilation to display warnings and errors.
-
Install the Rust (rls) extension by user 'rust-lang' in VS Code. There are several other plugins, but this one is the most maintained.
-
Reload the window in VS Code, or restart VS Code
-
If you see an error message that the RLS could not be started or that the extension could not find rustup, then you will have to configure VS Code's path for rustup:
-
Open VS Code preferences and navigate to the Rust extension preferences
-
Modify the rustup path to use an absolute path to your installation:
C:\Users\<username>\.cargo\bin\rustup -
Reload the window in VS Code, or restart VS Code
-
You may see a prompt in the lower-right to install the RLS. If so, click yes.
-
-
Open a Rust file and test out the RLS:
- Try autocompletion (for example start typing
use std::) at the top of a file - Try the incremental compilation (for example
println!("Hello, world!") blah blah 42 42should show an inline error)
- Try autocompletion (for example start typing
-
Enable format on save in VScode settings. Code->Preferences->Settings->Text Editor->Formatting->Format On Save
Installing Rust with Rustup
- Visit rustup.rs, to install the rust toolchain.
Choosing your editor
Whatever editor you choose, the goal is for you to have RLS and Code Formating (rustfmt) installed and enabled. VSCode is a mature and populare solution for Rust, but Vim is usable as well.
Configuring vim 8.x for Rust with the RLS
The steps below configure vim 8.x to support Rust and use the Rust Language Server (RLS) for autocompletion.
- Make sure you have a working Git installation
- Visit https://rls.booyaa.wtf and follow the steps for your preferred Vim package management strategy.
- Modify your vimrc to include the below snippet. The guide linked in the previous step is still configured to use the Rust nightly build, since the RLS used to only be available in the nightly builds. RLS is now available in stable, and we installed stable Rust (the default). The below snippet should replace the one from the linked guide, and changes the 'cmd' to use stable instead of nightly.
if executable('rls')
    au User lsp_setup call lsp#register_server({
        \ 'name': 'rls',
        \ 'cmd': {server_info->['rustup', 'run', 'stable', 'rls']},
        \ 'whitelist': ['rust'],
        \ })
endif
-
Make sure
filetype plugin indent onandsyntax enableand lets add format on save as well likelet g:rustfmt_autosave = 1 -
Restart vim or reload your vimrc
-
Open a Rust file and test our autocompletion (for example start typing
use std::)
Configuring VS Code for Rust with the RLS
The steps below configure VS Code on Mac to support Rust and use the Rust Language Server (RLS) for autocompletion and incremental compilation to display warnings and errors.
-
Install the Rust (rls) extension by user 'rust-lang' in VS Code. There are several other plugins, but this one is the most maintained.
-
Reload the window in VS Code, or restart VS Code
-
If you see an error message that the RLS could not be started or that the extension could not find rustup, then you will have to configure VS Code's path for rustup:
-
Open VS Code preferences and navigate to the Rust extension preferences
-
Modify the rustup path to use an absolute path to your installation:
C:\Users\<username>\.cargo\bin\rustup -
Reload the window in VS Code, or restart VS Code
-
You may see a prompt in the lower-right to install the RLS. If so, click yes.
-
-
Open a Rust file and test out the RLS:
- Try autocompletion (for example start typing
use std::) at the top of a file - Try the incremental compilation (for example
println!("Hello, world!") blah blah 42 42should show an inline error)
- Try autocompletion (for example start typing
-
Enable format on save in VScode settings. Code->Preferences->Settings->Text Editor->Formatting->Format On Save
Anatomy
We’ve got a few tools to get to know
- rustup - manage tools and versions of toolchains
- rustc - rust compiler
- cargo - manage modules locally and remotely and drives rustc
EXERCISE: Open a terminal and create a new package with cargo new training and go to that directory with cd training
Now we have a Cargo.toml which defines our project, not unlike a package.json if you're familiar with Node.js, it defines dependencies we're using and other project information:
[package]
name = "training"
version = "0.1.0"
authors = ["First Last"]
edition = "2018"

[dependencies]
In src folder we have main.rs, a Rust file. In this case it generated a simple hello world.
fn main() {
    println!("Hello, world!");
}
We're starting to get some syntax for you. Notice functions are denoted fn, we use semicolons to end expressions, and the exclamation after println!() means that is a function-like macro. We'll talk more about macros later.
Generally we'll interact with the compiler via Cargo. Cargo drives the rustc compiler and linker all under the hood. We can cargo build or better yet cargo run and save ourselves a step:
$ cargo run
   Compiling training v0.1.0 (/Users/firstlast/training)
    Finished dev [unoptimized + debuginfo] target(s) in 0.50s
     Running `/Users/firstlast/.cache/target/debug/training`
Hello, world!
The default build directory is target, and by default we got a debug build
$ ls target/debug/
build  examples  native  training.d
deps  incremental  training  training.dSYM
Note, we could run or debug that built asset directly:
./target/debug/training
Hello, world!
Also note, we could have compiled this simple file with the rustc compiler directly
$ rustc src/main.rs
$ ./main
Hello, world!
However in practice almost no projects are single files require merging multiple modules from within our project and without and thus Cargo is THE way we interact with Rust.
Data types
On this section well explore data types like String, structs, function syntax, and make a slightly convoluted example to hold the input and output file names that we'll take via command line for our images later.
We’ve got all the datatypes you would expect but you might want to glance through the Rust book chapter on variables, functions, and control flow just to update your mental models to Rust notation.
We have signed and unsigned scalar types like u32 and i32 and we've got Strings. Variables are instantiated with let syntax, and notably are immutable by default.
The top of the Rust standard library page has a search box. Entering String there we find std::string::String with a bunch of example usage right there for us. You can edit those examples and run them right in your browser to confirm your understanding and even click the [src] link in the upper right corner and be taken straight to the Rust implementation.
While you totally can thrash around on stack overflow, and we all do, there really is an authoritative source that you should check first.
From that example we have our String::from constructor. Lets assume we saved an image file as "valve.png" that we'll eventually open, passing that from command line. For now lets just hardcode our filename.
fn main() {
    let input_path = String::from("valve.png");
    println!("Hello, world!");
}
First, note we don’t need to import anything (we call it use) to use this String type. A portion of the standard library is in our namespace automatically, which we call the prelude. Basically Rust puts use std::prelude::v1::*; at the top of your file and you get access to those members. By no means is everything in there, but a lot is, which is what kept you from explicitly writing use std::string::String at the top of your file in this case. The println! macro came from there as well.
Digression on cargo-expand
Out of the scope for this workshop, but if you wanted to install a cargo tool called cargo-expand you could see the expanded result of your code with all macros and preludes included but before it has been optimized to machine code.
$ cargo install cargo-expand
..
$ cargo expand
#![feature(prelude_import)]
#[prelude_import]
use std::prelude::rust_2018::*;
#[macro_use]
extern crate std;
fn main() {
    let input_path = String::from("valve.png");
    {
        ::std::io::_print(::core::fmt::Arguments::new_v1(
            &["Hello, world!\n"],
            &match () {
                () => [],
            },
        ));
    };
}
$
You don't have to understand all that, but just to show if Rust ever feels magic, there are tools to look under the hood to see whats going on.
Also notice we didn't have to explicitly type our input_path variable even though Rust is a typed language. What Rust can figure it out, it will and so its entirely idiomatic to omit type annotations. However if you or the compiler are having trouble or getting odd type errors, start annotating some of your types like to see if you can give the compiler a hand. Its also a great way to figure out what type you actually have in case you're not sure, let the compiler (or linter) tell you.
Lets assume that we want to store our output name as "valve_sobel.png". The compiler doesn't need it in this instance but we can add a type annotation after the variable name with a colon and type like :String.
fn main() {
    let input_path = String::from("valve.png"); // <- no type annotation
    let output_path: String = String::from("valve_sobel.png"); // <- type annotation
    println!("Hello, world!");
}
So now how to print those variables to console instead of that useless "hello world". In Rust our formatting character is {}. Following the println!() documentation down the rabbit hole will send us to the formatters section page and we find all the formatters which you would expect like hex {:x}, binary {:b} etc. We're going to focus on the Debug formatter {:?} for now which is almost always implemented for types in Rust though the output may not be pretty.
fn main() {
    let input_path = String::from("valve.png");
    let output_path = String::from("valve_sobel.png");
    println!("{:?} {:?}", input_path, output_path);
}
Objects, we call them structs, should be very familiar. You can define a variable and construct a struct in any scope you like and we can name and type their members. This is somewhat a convoluted example, but lets make a struct called Arguments to hold our stubbed command line arguments.
// definition of our struct
struct Arguments {
    // name   : type
    input_path: String,
    output_path: String,
}

fn main() {

    // manully contstruct an instance of our struct
    let arguments = Arguments {
        // well keep using our hardcoded names for now until we learn how to get arguments from the command line
        input_path: String::from("valve.png"),
        output_path: String::from("valve_sobel.png"),
    };

    println!("{:?} {:?}", arguments.input_path, arguments.output_path);
}
Notice we access our struct members with dot notation, and there is no default new constructor or overloading in Rust. Though in practice, for functions where it makes sense many developers will make their struct members private and require the usage of a constructor -- occasionally but not necessarily called new. For instance earlier, String::new() totally exists and would have made you an empty string. However there is no way to manually construct a string like let input_path = String { something: "valve.png" };
Lets start modularizing our main by putting our argument creation into a function. Function syntax is just like we see in the main function.
// name        -> return type
fn arguments() -> Arguments {

    let arguments = Arguments {
        input_path: String::from("valve.png"),
        output_path: String::from("valve_sobel.png"),
    };
    return arguments; // <- explicit return statement
}
We use semicolons to end expressions and 'return' the value to a variable or out of the function. We often prefer to leave off semicolons for brevity and implicitly return the expression from a function like so.
EXERCISE: Put everything together and call our arguments() function from main.
struct Arguments {
    input_path: String,
    output_path: String,
}

fn arguments() -> Arguments {
    Arguments {
        input_path: String::from("valve.png"),
        output_path: String::from("valve_sobel.png"),
    }
}

fn main() {
    let arguments = arguments();
    println!("{:?} {:?}", arguments.input_path, arguments.output_path);
}
Now we have a simple little program with most of the syntax we need. In our next chapter, we'll get our actual arguments from the command line, and learn about error handling in Rust.
Arguments and Option and Result
Rust doesn’t have exceptions but there is a minimal runtime, which means if were not careful we can and will blow up at runtime. This is called a panic and is handled in the panic handler, which on hosted platforms includes unwinding and backtraces. You can fire it on purpose with panic!().
(starting from an empty main for just a second)
fn main() {
    panic!("ded");
    println!("Hello World");
}
EXERCISE: Run this program on your machine. Notice the program gets no further than the panic and nothing is printed.
thread 'main' panicked at 'ded', src/main.rs:4:5
note: run with `RUST_BACKTRACE=1` environment variable to display a backtrace
In Rust we try to program defensively and not let our users ever see messages like that.
We'll learn more about errors in a second, but let's take our arguments from the command line at runtime instead of hard coding them at compile time. Searching the standard library for args finds args come in as a iterator of a collection. We'll talk about iterators later, but for now we can for in loop over them, or use the nth() function to get a specific value.
use std::env; // explicit use (import) finally

fn main() {
    println!("{:?}", env::args().nth(0));
    println!("{:?}", env::args().nth(1));
    println!("{:?}", env::args().nth(2));
}
NOTE: you can pass command line arguments around cargo and to your program with a double dash
cargo run -- valve.png valve_sobel.png
EXERCISE: Run this program on your machine. We can't run this in the browser because we can't pass arguments to it.
$ cargo run
   Compiling blah222 v0.1.0 (/home/jacob/Downloads/blah222)
    Finished dev [unoptimized + debuginfo] target(s) in 0.98s
     Running `target/debug/blah222`
Some("target/debug/blah222")
Some("valve.png")
Some("valve_sobel.png")
Just like C style languages, the 0th argument is the name of the binary and the rest are your arguments. Hrm but did you notice we have this Some type wrapping our Strings...
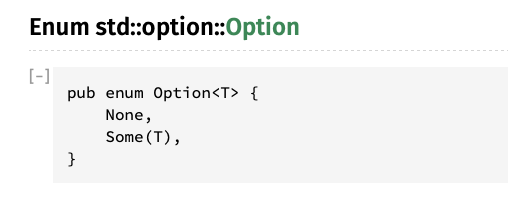
Rust doesn't have Null but rather the Option type which can be used to propagate either a value (Some), or the lack of one (None)
The problem is the nth argument may or may not be there... This is one of the original sins of C style languages. They allowed Null for all data types which, when not handled immediately, can sneak further into the program and cause crashes or corrupted data days weeks or months later.
Erorrs are handled similarly in Rust with the Result type which can be used to propagate either the error or the result and looks like this:
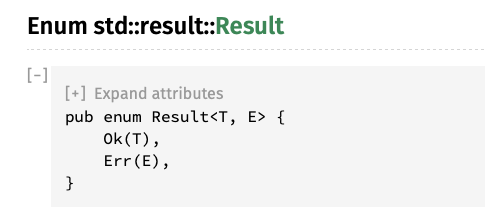
Were going to skip Result here for now, as our nth() method returns an Option, but they’re very similar in how they’re handled as they’re both implemented as enums.
In Rust we can't just access many of our values, we ofen need to unwrap() them to peel off the enum they come wrapped in.
use std::env;

fn main() {
    println!("{:?}", env::args().nth(0).unwrap());
    println!("{:?}", env::args().nth(1).unwrap());
    println!("{:?}", env::args().nth(2).unwrap());
}
EXERCISE: Run this new program.
"target/debug/blah222"
"valve.png"
"valve_sobel.png"
No more Some() wrapping our strings.
EXERCISE: Run our program again, this time not passing any command line arguments.
thread 'main' panicked at 'called `Option::unwrap()` on a `None` value', src/libcore/option.rs:347:21
note: run with `RUST_BACKTRACE=1` environment variable to display a backtrace.
It may seem like were no better off than C style languages, but at least we crashed at the earliest possible opportunity. unwrap() is the most brute force way this can be done and is not ideal, but until we learn more its totally fine. The default error message isn't very useful to our users though so often well use .expect() instead of unwrap() in order to provide a better message.
use std::env;

fn main() {
    println!("{:?}", env::args().nth(1).expect("You must pass an input file name as the first argument"));
    println!("{:?}", env::args().nth(2).expect("You must pass an output file name as the second argument"));
}
EXERCISE: Run our program again, this time not passing the first and or second argument.
$ cargo run -- valve.png
    Finished dev [unoptimized + debuginfo] target(s) in 0.01s
     Running `target/debug/blah222 valve.png`
"valve.png"
thread 'main' panicked at 'You must pass an output file name as the second option to this program', src/main.rs:14:14
note: run with `RUST_BACKTRACE=1` environment variable to display a backtrace
$
There's definately command line argument parsing libraries that would do all this for us, a popular one is called Clap, but for now it is good to understand what is happening under the hood.
EXERCISE: Swap our hardcoded arguments from the previous page for our new command line arguments.
Next chapter we'll look at the Image library, and load up an image with our filenames.
external dependencies, crates.io
Lets have our code load in an image from the filesystem. Searching in the standard library for images doesn't find anything, we could take a File to binary, but lets go to the community ecosystem, crates.io. Searching there for images finds a crate image with ~1mil downloads which seems to be pretty popular. image says it wants us to add it to our Cargo.toml dependencies section so lets do that.
[dependencies]
image = "0.22.1"
The Cargo toml manifest version field we learn Cargo uses semantic versioning which allows us to version and lock dependencies at the level of risk were comfortable with. From the spec:
Given a version number MAJOR.MINOR.PATCH, increment the:

MAJOR version when you make incompatible API changes,
MINOR version when you add functionality in a backwards compatible manner, and
PATCH version when you make backwards compatible bug fixes.
The Cargo chapter on dependencies explains more how to do this locking. The three digit version we used above is the same as a caret requirement as if we had type image = "^0.22.1". With this requirement Cargo is allowed to use any version it can satisfy between the range >=0.22.1 <0.3.0 Semver works different below and above 1.0 with the idea that theres more breaking churn below 1.0. So for a fictional image = "^1.2.3" Cargo would be allowed to find patches >=1.2.3 <2.0.0. Refer to the spec and the book for many more clarifying examples.
Loading the input image
Now in main.rs we can use this dependency. To start, let's just write the input to the output, passthrough, using the image create we looked at earlier.
use image;
let arguments = arguments().expect("Failed to parse command arguments!");
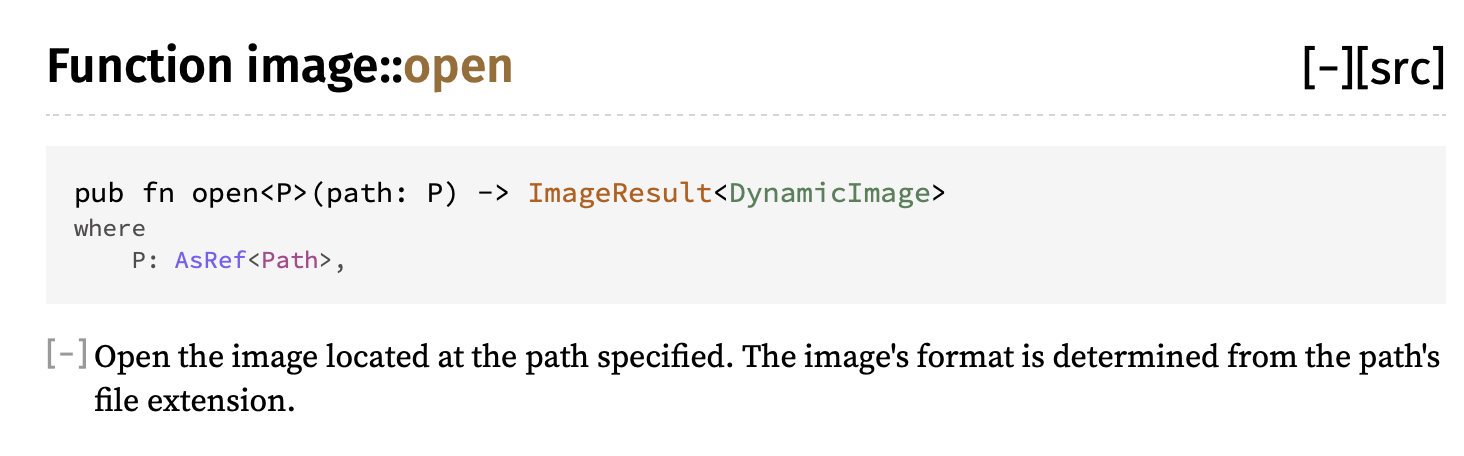
let input_image = image::open(&arguments.input_path)
.expect("Failed to open input image file");
input_image.save(&arguments.output_path)
.expect("Failed to save output image to file");
Repeatedly using the same variable name, called shadowing, is often even encouraged, as it means less messy temporary variables.
Converting to grayscale (or luma)
In our next section we're going to need an image in grayscale, with one value per pixel. Converting an RGB image to grayscale requires specific weights per component, but luckily the image create already implements this for us. We just need to figure out how to use it. Let's take a look at the docs again.
to_luma() method
From looking at the docs on image::open we now know that it returns a DynamicImage type. If we peek at the DynamicImage docs we'll find a function called to_luma(), which is exactly what we want. Notice it returns a different type, GrayImage.
Since types and abstractions in Rust don't incur overhead, it's pretty typically to use more types than less to represent different possible data structures and formats. This not only makes code clear to the reader, but also allows the compiler to help you enforce invariants.
For example, we can make our processing code later only accept GrayImage as input, which makes sure the caller has converted any inputs.

let input_image = image::open(&arguments.input_path)
    .expect("Failed to open input image file");

let input_image = input_image.to_luma();

input_image.save(&arguments.output_path)
    .expect("Failed to save output image to file");
Borrowing
The borrow checker is probably Rust's most distinctive feature. To enable zero cost abstractions, Rust does not have a garbage collector. However, Rust also doesn't rely on explicit calls to free() like C. Instead Rust enforces "ownership" for all memory objects. The rules of the ownership system are pretty simple:
-
There is only ever one owner of a memory object at a time (struct, enum, primitive, etc)
-
Immutable (read-only) ownership can be borrowed multiple places simultaneously
-
Mutable (writable) ownership can only be borrowed once at a time and exclusively
-
An object must live at least as long as all of its borrows
Rule #1: single owner
fn eat(s: String) {
    println!("Eating {}", s);
}

fn main() {
    let food = String::from("salad");
    eat(food);
    eat(food);
}
The compiler error tells us exactly what's wrong. The fn eat(s: String) signature says that s will be moved into the function upon calling. In other words, the function eat will take ownership of s. Unless we pass ownership back to the caller, ownership will remain there. This is called "consuming" a parameter.
Here's how we can pass ownership back.
fn eat(s: String) -> String {
    println!("Eating {}", s);
    s
}

fn main() {
    let food = String::from("salad");
    let owned_food = eat(food);
    eat(owned_food);
}
Rule #2: multiple immutable borrows
If we change the function signature to borrow s instead, the problem goes away.
fn stare_at(s: &String) {
    println!("Drooling over {}", s);
}

fn main() {
    let food = String::from("donut");
    let another_ref = &food;
    stare_at(&food);
    stare_at(&food);
    stare_at(another_ref);
}
Rule #3: mutable borrows are exclusive
Only a mutable borrow for an object can exist at a time. This prevents many subtle errors where internal state is mutated while other does not expect it. In C++, modifying a container while iterating through it is a classic example.
fn main() {
    let mut number: usize = 32;

    let borrowed = &number;
    println!("Borrowed: {}", borrowed);

    let mut_borrowed = &mut number;
    *mut_borrowed = 59;
    println!("Mut borrowed: {}", mut_borrowed);
    println!("Borrowed: {}", borrowed);
}
You'll notice the compiler gave us an error because we have an immutable borrow out there when we try to mutably borrow number. Any additional borrows, mutable or not, will make a mutable borrow invalid.
When we have an exclusive mutable borrow, all is good.
fn main() {
    let mut number: usize = 32;

    let mut_borrowed = &mut number;
    *mut_borrowed = 59;
    println!("Mut borrowed: {}", mut_borrowed);
}
Rule #4: lifetime >= borrow time
In the example below, we borrow a temporary value inside the if statement branches. The temporary value does not last beyond the if statement branch, so the compiler tells us that our borrow is invalid. We can't borrow an object that doesn't exist.
fn main() {
    let borrowed = if 1 + 1 == 2 {
        let msg = "The world is sane.";
        &msg
    } else {
        let msg = "The world is insane!";
        &msg
    };
}
The learning curve
Many new Rustaceans report that the fighting the borrow checker is the hardest part of learning Rust, and kind of like hitting a wall. Programmers coming from C/C++ tend to have a hard time because they know exactly what they want to do, but the Rust compiler "won't let them do it".
Over time, the borrowing rules and working with the borrow checker become second nature. In fact, the borrow checker enforces rules that well-written C++ code should abide by anyway. Working with the borrow checker is kind of like pair programming with a memory ownership expert.
The borrowing rules prevent all kinds of common C++ memory and security errors. For example, you can't create a dangling borrow, the compiler won't let you. In C/C++, you can quite easily create a dangling pointer!
Cloning
While you are learning Rust, you will face another temptation: clone everything! The Clone trait in Rust provides the method clone() which creates a copy of any objects that implements Clone. When something is cloned, the borrows on the original do not apply to the new copy.
fn main() {
    let mut number: usize = 32;

    let cloned = number.clone();
    println!("Cloned: {}", cloned);

    let mut_borrowed = &mut number;
    *mut_borrowed = 59;
    println!("Mut borrowed: {}", mut_borrowed);
    println!("Cloned: {}", cloned);
}
Lifetimes and scopes
One last thing to note about lifetimes is that they are tied to scopes. So a borrow must exist in a scope at or below the level of the ownership.
fn main() {
    let mut number: usize = 32;
    {
        let borrowed = &number; // works!
        println!("It works: {}", borrowed);
    }

    {
        let number2: usize = 64;
    }
    let borrowed2 = &number2; // fails!
}
Also, Rust allows a scope to return a value. This is useful for temporarily borrowing a value in a limited scope and computing some value without creating a whole separate function for it.
fn main() {
    let number: usize = 32;
    let new_number = {
        let borrowed = &number;
        borrowed + 16
    };
    println!("{}", new_number);
}
Convolution and testing
Convolving a kernel with an image is an incredibly common operation in all kinds of image processing. With it we can implement all the machine learning greatest hits, which for images as you can see includes edge detection sharpen, blur and more. Convolution should remind you of Convolution Neural nets and might give you an idea how those work too.
From wikipedia:
Convolution is the process of adding each element of the image to its local neighbors, weighted by the kernel. This is related to a form of mathematical convolution. The matrix operation being performed—convolution—is not traditional matrix multiplication, despite being similarly denoted by *. For example, if we have two three-by-three matrices, the first a kernel, and the second an image piece, convolution is the process of flipping both the rows and columns of the kernel and multiplying locally similar entries and summing
a b c    1 2 3
d e f  * 4 5 6
g h i    7 8 9
= (i*1) + (h*2) +  (g*3) + (f*4) + (e*5) + (d*6) + (c*7) + (b*8) + (a*9)
That looks a bit annoying to implement in code, but they mention an implemention flipping rows and columns of the kernel.
i h g
f e d
c b a
Then we can just pair up the upper left to the upper right and so on, thats our zip() operation!
i h g    1 2 3
f e d  * 4 5 6
c b a    7 8 9
= (i*1) + (h*2) +  (g*3) + (f*4) + (e*5) + (d*6) + (c*7) + (b*8) + (a*9)
and we get the same result. So lets store our kernels in mirrored form and plan to use zip().
Lets do a little test driven development in order to show off Rust's built in testing capability. So we need 2 matrices, some data (think of it as pixels of an image) and a kernel someone figured out and published for us. Did you notice the Identity Kernel on the wikipedia page? That kernel, when convolved on data, simply returns back the original data unchanged. That would be an easy test to write.
From wikipedia the identity kernel is
+0 +0 +0
+0 +1 +0
+0 +0 +0
If we mirror in x and y, all the zeros move around and it ends up looking exactlythe same so no real work to be done there. How should we define it in Rust though? We can define the data in many structures including Vecs, Arrays, or a math library might offer a Matrix type of some kind. Looking at the identity kernel we need a 3x3 and our pixel data will be a float. For now let's use a fixed size array of fixed size arrays. This preserves the row and column structure of the kernels. We'll use the const keyword to define these as constant, static data outside of any function. The compiler will not let us in any way mutate this data.
const IDENTITY_KERNEL_MIRRORED: [[f32; 3]; 3] = [
    [0.0, 0.0, 0.0],
    [0.0, 1.0, 0.0],
    [0.0, 0.0, 0.0]
];
Now we need some test data to convolve with our identity. When we convolve we're looking at the value of interest, generally the center value, but we also take with it some amount of its nearby values in order to let those effect the value we care about. This is the value were 'convolving' around. Lets just make up a fake set of pixels, 1.0 through 9.0 where the value of interest is thus 5.0.
let pixels: [[f32; 3]; 3] = [
    [1.0, 2.0, 3.0],
    [4.0, 5.0, 6.0],
    [7.0, 8.0, 9.0]
];
We need a convolve function that takes the kernel we want to convolve around the data. We could jump in and try and write the whole thing but lets procrastinate a bit more. We need our function to have 2 arguments, the kernel and the pixel data, and we probably don't want to consume them as we might want to use them in another function so lets take borrows of those as our arguments. Further if we run the convolve steps we previously discussed above by hand, you'd expect the identity, which doesnt change our value of interest, to just return the value in this case 5.0 so let's hardcode that.
fn convolve(kernel: &[[f32; 3]; 3], pixels: &[[f32; 3]; 3]) -> f32 {
    5.0
}
Now we can write a test to assert that running convolve() indeed does return 5.0. You can simply place the testing right inside your main.rs file and cargo will pick it up. We can run this test with cargo test and we should see passing tests!
Note rust doesn't show println data from tests, so use
cargo test -- --nocaptureto see your println debugging in this case.
If you attempt to just assert that 5.0 and result are equal the compiler will link you to an explanation on how to correctly compare floats. Everything with floats is approximate so we can't just assert that they are equal, we have to say they're within some tolerance.
#[cfg(test)]
mod tests {
    use super::*;

    #[test]
    fn test_convolution_identity() {
        let pixels: [[f32; 3]; 3] = [
            [1.0, 2.0, 3.0],
            [4.0, 5.0, 6.0],
            [7.0, 8.0, 9.0]
        ];
        let result = convolve(&IDENTITY_KERNEL_MIRRORED, &pixels);

        assert!((result - 5.0).abs() < f32::EPSILON);
    }
}
We'll come back to actually implmenting our convolve function for real in a second, but we'll need a few more tools in our toolbox so first we learn how to iterate over these arrays and multiply them using iterators.
Iterators
Iterators are one of the most powerful features in Rust! They are also a gateway drug to the functional style programming. They tend to use less memory and optimize better because the compiler can see what we're trying to do and help optimize for us. This gain in speed and reduced memory usage is really important for big datasets or constrained devices where it might be literally impossible to have the entire collection in memory at the same time.
Most collections like an array can be iterated which just means getting the collection one element at a time. This imperitive style use of an iterator should look very familiar to you. Well just print each value.
fn main() {
    let array = [22.0, 1.0, 17.0];

    for i in array.iter() {
        println!("{:?}", i);
    }
}
One of the benefits of using iterators is all the functions we get for free. These are generally called 'combinators' but thats just a fancy name for a function that we can run against our collection. The Rust standard library provides a large selection of combinators for use with iterators from summing, to sorting to reversing data and much much more.
Lets reverse our array with rev().
fn main() {
    let array = [22.0, 1.0, 17.0];
    for i in array.iter().rev() {
        println!("{:?}", i);
    }
}
If we wanted to do some custom logic like add, we could certainly do it in the for loop.
fn main() {
    let array = [22.0, 1.0, 17.0];

    for i in array.iter() {
        let val = i + 1.0;
        println!("{:?}", val);
    }
}
But thats not very functional. If we keep this up were just back at the imperitive style. Lets look at the map combinator instead. It lets us define a function to be run on each element one at a time, and we'll do our addition there instead. This way we can seperate concerns keeping our functions single which also has the benefit in that compiler can see better what we're doing so it can optimize better.
fn main() {
    let array = [22.0, 1.0, 17.0];
    for i in array.iter().map(|i| { i + 1.0 } ) { // <- Note no semicolon, we're returning the result of our addition. Also the rust formatter will remove these uneeded brackets are needed as its only a single expression
        println!("{:?}", i);
    }
}
Ok now lets add AND reverse.
fn main() {
    let array = [22.0, 1.0, 17.0];
    for i in array.iter().rev().map(|i| i + 1.0) {
        println!("{:?}", i);
    }
}
Very slick. How many times have you come across a for loop that you have to puzzle over for 10 minutes to understand what 5 things its doing at the same time? Chained combinators are very self documenting, because they all have names and can be read in order. Plus by not reimplementing simple functions, you don't reimplement the bugs either. Future you thanks present you.
Lets get even a little bit more functional. If instead of just for looping we assign the iterator to a value, we can hold the intermediate iterator and reuse it or pass it to functions.
fn main() {
    let array = [22.0, 1.0, 17.0];
    let reversed_and_elevated = array.iter().rev().map(|i| i + 1.0);
    println!("{:?}", reversed_and_elevated);
}
Interesting. This time it didn't print our end result, but rather printed the chain of mutations plus the original data Map { iter: Rev { iter: Iter([22.0, 1.0, 17.0]) } }. It turns out iterators are 'lazily evaluated' which means theyre not actuall run until they're consumed. The for in loop and the .sum() are operations we have previously seen that consume an iterator. Another function that consumes an iterator is collect() which collects all the values back into a whole new array.
We actually can't collect into Array data structures (yet). Instead we'll use a Vec which we won't go over much here yet, but its just another collection type that is a bit more costly and powerful than arrays.
NOTE: This is actually the costly thing we've been avoiding all this time. It brings all the values back into memory and can take lots of memory and compute time. For debugging, desktop programming and small datasets its totally fine and eventually often you just need to consume and get back to an
Vec. However when you move to the optimizing stage, or if you're running on constrained devices, you're looking to remove as manycollect()as possible and just keep chaining iterators.
So lets collect our iterator and print the result. The compiler often has trouble knowing what you're trying to collect to so we'll help it out with a type hint.
fn main() {
    let array = [22.0, 1.0, 17.0];
    let reversed_and_elevated = array.iter().rev().map(|i| i + 1.0);
     // We `clone` the iterator which is cheap, its not copying the datastructure just our mutation chain
    let reversed_and_elevated_array: Vec<f64> = reversed_and_elevated.clone().collect();
    println!("{:?}", reversed_and_elevated_array);

    // Now we can use it again or pass it to another function, or add more combinators. Note we didn't need to clone it this time since we don't use it again in this example, but we could.
    let un_reversed_and_elevated_array: Vec<f64> = reversed_and_elevated.rev().collect();
    println!("{:?}", un_reversed_and_elevated_array);
}
To show what lazily evaluated means, run this example with no collect or for loop.
fn main() {
    let array = [22.0, 1.0, 17.0];
    array.iter().rev().map(|i| {
        println!("{:?}", i);
        i + 1.0
    });
}
Note that nothing was printed because the map() wasn't actually run. The playground probably lost the warning, but if you do accidently run this code on your machine, the compiiler has your back with the following warning.
warning: unused `Map` that must be used
 --> src/main.rs:3:5
  |
3 |     array.iter().rev().map(|i| i + 1.0);
  |     ^^^^^^^^^^^^^^^^^^^^^^^^^^^^^^^^^^^^
  |
  = note: `#[warn(unused_must_use)]` on by default
  = note: iterators are lazy and do nothing unless consumed

warning: 1 warning emitted
It gets a little more complex from here but were going to need a few more tools as we continue. zip() combines one value from each of two different iterators into a tuple like (22.0, 4.0).
fn main() {
    let array1 = [22.0, 1.0, 17.0];
    let array2 = [4.0, 19.0, 6.0];

    // you might want print in the map so you can better understand the (i,j) tuple
    let zipped = array1.iter().zip(array2.iter()).map(|(i, j)| i + j);
    let summed_array: Vec<f64> = zipped.collect();
    println!("{:?}", summed_array);
}
flatten() iterates through iterators like n dimensional structures and concatenates them one after the other, or "flattens" them. If we had a two dimensional array of arrays and wanted to turn it into a single flat array we would use flatten(). One more trick is needed here, our iterator is pointing at borrowed references to the arrays. We need to use cloned() on our iterator in order to turn our &f32 values in f32. If we run this without the compiler says "value of type Vec<f32> cannot be built from `std::iter::Iterator<Item=&f32>"
fn main() {
    let array: [[f32; 3]; 3] = [
            [1.0, 2.0, 3.0],
            [4.0, 5.0, 6.0],
            [7.0, 8.0, 9.0]
    ];
    println!("{:?}", array);

    let flat_array: Vec<f32> = array.iter().cloned().flatten().collect();
    println!("{:?}", flat_array);
}
Finally if we wanted to both flatten() and map() at the same time we can use flat_map().
fn main() {
    let array: [[f32; 3]; 3] = [
            [1.0, 2.0, 3.0],
            [4.0, 5.0, 6.0],
            [7.0, 8.0, 9.0]
        ];
    println!("{:?}", array);

    let flat_mapped_array: Vec<f32> = array.iter().flat_map(|i| {
        // each i is an entire row of the array, it hasn't been flattened yet
        println!("{:?}", i);
        // we could do something complex but well just print the inner elements
        i.iter().cloned().map(|j| {
            println!("{:?}", j);
            j
        })
    }).collect();
    println!("{:?}", flat_mapped_array);
}
Thats all we'll need for our convolution for now, but if you want even more combinators, checkout the itertools crate.
Convolution Continued
Lets revisit our Convolution operator
If you'll remember we left you with stubbed test for the identity kernel. When identity is run against our data it should just return the data unchanged, in the case of our test data return 5.0.
fn convolve(kernel: &[[f32; 3]; 3], pixels: &[[f32; 3]; 3]) -> f32 {
    5.0
}
We can use zip() to combine two iterators into one iterator that yields tuple elements. Since kernel and pixels are nested arrays, kernel.iter() and pixels.iter() both give iterators over elements of type [f32; 3]. So, the tuple parameter (kernel_column, input_column) has type ([f32; 3], [f32; 3]). We also know at the end were going to add all the products up.
fn convolve(kernel: &[[f32; 3]; 3], pixels: &[[f32; 3]; 3]) -> f32 {
        kernel
        .iter()
        .zip(pixels.iter())
        // something has to happen here
        .sum()
}
Exercise: Finish out the convolve function we stubbed earlier. You'll need everything we went through on the iterators page so head back there and think hard on how you can multiply each element of each matrix and return the sum of the results.
Uncollapse for the answer. But try first!
Now in the flat_map() closure we iterate and zip once again and we now have our matching element from each array (f32, f32) which we can multiply together and then return. We've flattened our array of arrays into just numbers.
fn convolve(kernel: &[[f32; 3]; 3], pixels: &[[f32; 3]; 3]) -> f32 {
    kernel
        .iter()
        .zip(pixels.iter())
        .flat_map(|(kernel_column, input_column)| {
            kernel_column
                .iter()
                .zip(input_column.iter())
                .map(|(k, p)| k * p)
        })
        .sum()
}
Ok now we have a working convolve function with an identity kernel, but we need our Sobel edge detection kernel instead now. The Sobel Wikpedia page shows we actually need two kernels, estimating the gradient of each Gx and Gy. In an image, the gradient describes how fast the color of the image is changing in a direction, X and Y in this case. Typically, edges change very quickly, so if we output the gradient of the image, we expect the edges to have high values.
Gx:
+1 +0 -1
+2 +0 -2
+1 +0 -1
Gy:
+1 +2 +1
+0 +0 +0
-1 -2 -1
and remember we usually mirror them to make our implmementation easier to reason about
/// Kernel for the Sobel operator in the X direction
const SOBEL_KERNEL_X_MIRRORED: [[f32; 3]; 3] = [
    [-1.0, 0.0, 1.0],
    [-2.0, 0.0, 2.0],
    [-1.0, 0.0, 1.0]
];

/// Kernel for the Sobel operator in the Y direction
const SOBEL_KERNEL_Y_MIRRORED: [[f32; 3]; 3] = [
    [-1.0, -2.0, -1.0],
    [0.0, 0.0, 0.0],
    [1.0, 2.0, 1.0]
];
If we manually do the sobel x convolution on paper, we'd expect the result to be 8.0. Lets write another sanity test which if all is well should just pass since the hard work is already done.
    #[test]
    fn test_convolution_sobel_x() {
        let pixels: [[f32; 3]; 3] = [[1.0, 2.0, 3.0], [4.0, 5.0, 6.0], [7.0, 8.0, 9.0]];
        let x = convolve(&SOBEL_KERNEL_X_MIRRORED, &pixels);
        assert!((x - 8.0).abs() < f32::EPSILON);
    }
Exercise: Finish out a third test to make sure convolving sobel y also works correctly.
Next up lets get back to our real image data.
Image Processing Example
Getting the pixels
Our convolution function is ready, but we are missing the connection between the image we converted to luma and the convolution operator. Let's look into the docs on GrayImage to see how we can get pixel values out.
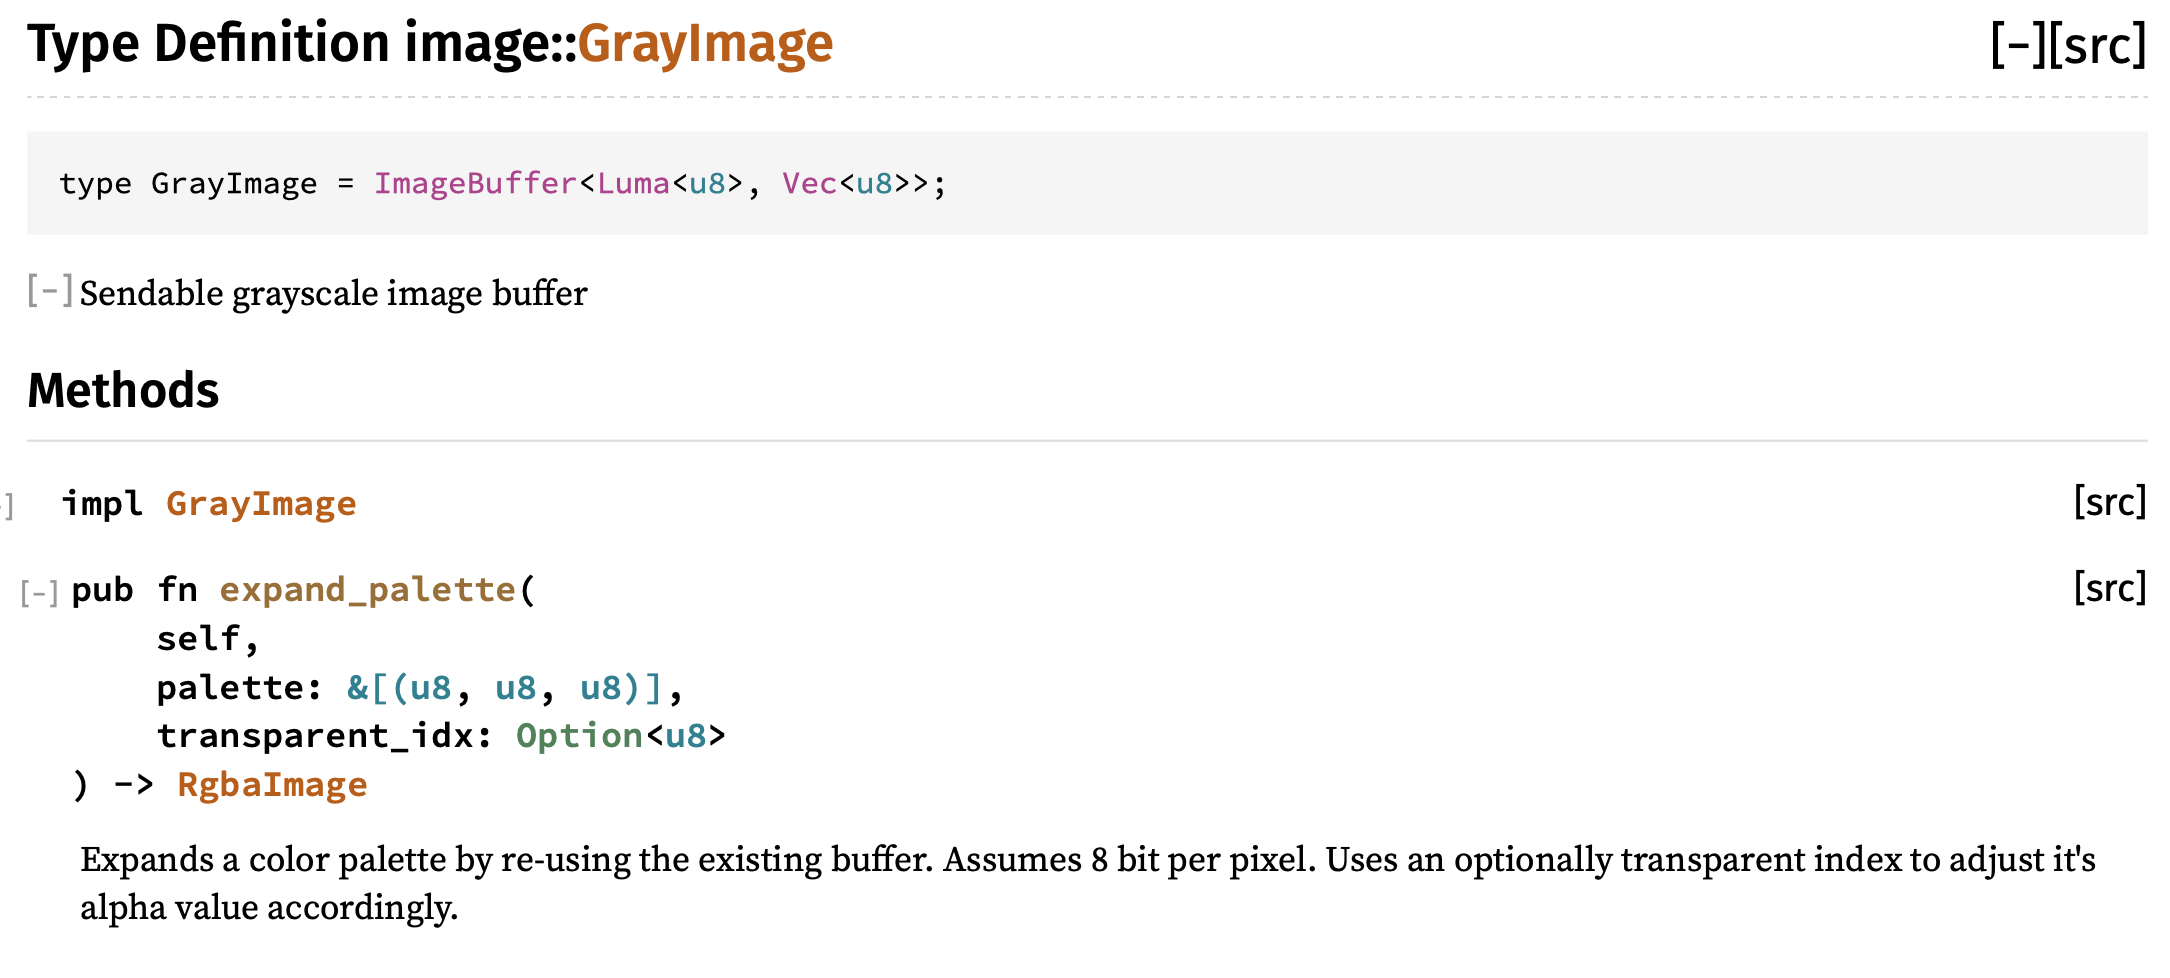
At first glance, it doesn't look like there are many methods, huh?
Let's take a closer look. GrayImage is defined as a type alias of a specific variation of ImageBuffer (using generic type parameters). If we click on ImageBuffer (usually in Rust docs, you can click on a type name to see its docs), we will see the full list of available methods.
![]()
There's a get_pixel method! Oh, but the return type is &P, that's weird. If we look at the declaration of ImageBuffer though, we see that P must implement the Pixel trait. And if we look at the Pixel trait docs, we see a method called channels() that gives us a slice of the pixel's values, one for each channel. Since out image is grayscale (luma), we expect just one channel.
This might seem over-complicated. However, by abstracting away the underlying storage formats, the "image" crate lets users build processing systems that are general over many image formats. Remember, the Rust compiler boils down all of the abstractions into highly optimized code. So we can have our generics and safety while writing high-performance code!
For our case, we just have a GrayImage with pixels of type Luma<u8> that implement the Pixel trait. So we should be able to fetch a pixel pretty easily. Here's a go:
use image::Pixel; // trait for '.channels()'

let input_image = image::open(&arguments.input_path)
    .expect("Failed to open input image file");

let input_image = input_image.to_luma();

println!("Pixel 0, 0: {}", input_image.get_pixel(0, 0).channels()[0]);

input_image.save(&arguments.output_path)
    .expect("Failed to save output image to file");
Generally, well-written Rust crates provide comprehensive types like this to cover the data formats and structures that they operate on. An image library in C/C++ may provide a raw buffer of pixels, which is easy to access. But, as soon as you have to deal with multiple formats, multiple pixel orderings (RGB, BGR, RGBA, etc.), it can be difficult to ensure all code branches are correct. With Rust, the type system will catch these errors at compile time.
Now that we can grab pixels, let's write a function that takes the pixel values and calls our convolution function. First we'll start with this signature, and copying the input. We need a place to store the resulting convolved pixel values, and we want an image of the same dimensions and data types. clone() is an easy way to get that. Notice that result is declared as mut since we will be modifying its contents.
use image::{GrayImage, Pixel};

fn sobel_filter(input: &GrayImage) -> GrayImage {
    let mut result = input.clone();

    result
}
To start with, let's just create the block of pixels to feed the convolution for each center pixel.
use image::{GrayImage, Pixel};

fn sobel_filter(input: &GrayImage) -> GrayImage {
    let mut result = input.clone();

    for x in 0..input.width() {
        for y in 0..input.height() {
            let pixels = [
                [
                    input.get_pixel(x - 1, y - 1).channels()[0],
                    input.get_pixel(x - 1, y).channels()[0],
                    input.get_pixel(x - 1, y + 1).channels()[0],
                ],
                [
                    input.get_pixel(x, y - 1).channels()[0],
                    input.get_pixel(x, y).channels()[0],
                    input.get_pixel(x, y + 1).channels()[0],
                ],
                [
                    input.get_pixel(x + 1, y - 1).channels()[0],
                    input.get_pixel(x + 1, y).channels()[0],
                    input.get_pixel(x + 1, y + 1).channels()[0],
                ],
            ];
        }
    }

    result
}
We'll need to throw a call into fn main() to use this.
let input_image = image::open(&arguments.input_path)
    .expect("Failed to open input image file");

let input_image = input_image.to_luma();

let input_image = sobel_filter(&input_image);

input_image.save(&arguments.output_path)
    .expect("Failed to save output image to file");
And then when we run this... what happened?!? What does it mean we attempted subtraction with overflow?
Well, in Rust debug builds, the primitive integer types are checked for overflows an underflows in the basic operations. Don't worry, these are not enabled in the release build unless you specifically want.
And, just like now, the overflow checks in debug builds help catch bugs early on.
Handling the edges
The overflow is happening because of the x - 1 and y - 1 when x or y is zero. Remember, the kernel includes one pixel left, right, up and down from the one its currently operating on. When were on the far border of our image that pixel doesn't exist. This is indicative of a bigger question: how should we handle the edges of the image?
As the Wikipedia page on convolution kernels explains, there are several ways:
- Extend the image by duplicating pixels at the edge
- Wrap around to the other side
- Crop the output image 2 pixels smaller in X and Y
- Crop the kernel on the edges and corners
If we crop the output image, we can easily adapt our code. The ImageBuffer struct implements the GenericImage trait which has a function called sub_image that gives us a view into rectangular section of an image. With a SubImage we can call to_image() to get a cropped ImageBuffer back out.
use image::{GenericImage, GrayImage, Pixel};

fn sobel_filter(input: &GrayImage) -> GrayImage {
    let mut result = input
        .sub_image(1, 1, input.width() - 2, input.height() - 2)
        .to_image();

    //start convolve in 1 pixel
    for x in 1..(input.width() - 1) {
        //start convolve in 1 pixel
        for y in 1..(input.height() - 1) {
            let pixels = [
                [
                    input.get_pixel(x - 1, y - 1).channels()[0],
                    input.get_pixel(x - 1, y).channels()[0],
                    input.get_pixel(x - 1, y + 1).channels()[0],
                ],
                [
                    input.get_pixel(x, y - 1).channels()[0],
                    input.get_pixel(x, y).channels()[0],
                    input.get_pixel(x, y + 1).channels()[0],
                ],
                [
                    input.get_pixel(x + 1, y - 1).channels()[0],
                    input.get_pixel(x + 1, y).channels()[0],
                    input.get_pixel(x + 1, y + 1).channels()[0],
                ],
            ];
        }
    }

    result
}
Oh, and did you find a place where clone might be handy?. Cool. No more overflows. We should get the convolution in there! Usually, we also divide by a constant value to "normalize" the result (really just make sure it is within the 0.0-1.0 range). For the Sobel operator on a 3x3 block of pixels, a divisor of 8.0 works well.
use image::{GenericImage, GrayImage, Pixel};

fn sobel_filter(input: &GrayImage) -> GrayImage {
    let mut result = input
        .clone()
        .sub_image(1, 1, input.width() - 2, input.height() - 2)
        .to_image();

    //start convolve in 1 pixel
    for x in 1..(input.width() - 1) {
        //start convolve in 1 pixel
        for y in 1..(input.height() - 1) {
            let pixels = [
                [
                    input.get_pixel(x - 1, y - 1).channels()[0],
                    input.get_pixel(x - 1, y).channels()[0],
                    input.get_pixel(x - 1, y + 1).channels()[0],
                ],
                [
                    input.get_pixel(x, y - 1).channels()[0],
                    input.get_pixel(x, y).channels()[0],
                    input.get_pixel(x, y + 1).channels()[0],
                ],
                [
                    input.get_pixel(x + 1, y - 1).channels()[0],
                    input.get_pixel(x + 1, y).channels()[0],
                    input.get_pixel(x + 1, y + 1).channels()[0],
                ],
            ];

            // normalize divisor of 8.0 for Sobel
            let gradient_x = convolve(&SOBEL_KERNEL_X, &pixels) / 8.0;
            let gradient_y = convolve(&SOBEL_KERNEL_Y, &pixels) / 8.0;
        }
    }

    result
}
Uh oh. Now we have a different problem. Our GrayImage gives us u8 from get_pixel(x, y).channels()[0], but convolve() expects the pixels to be f32.
We can explicitly cast that with 'as f32'.
We can also add a couple lines to combine our two kernels into a single magnitude with the sum of squares. Then well need to turn our resulting f32 into a u8 Luma type before storing it back into the resulting image.
use image::{GenericImage, GrayImage, Luma, Pixel};

fn sobel_filter(input: &GrayImage) -> GrayImage {
    let mut result = input
        .clone()
        .sub_image(1, 1, input.width() - 2, input.height() - 2)
        .to_image();

    //start convolve in 1 pixel
    for x in 1..(input.width() - 1) {
        //start convolve in 1 pixel
        for y in 1..input.height() - 1 {
            let pixels = [
                [
                    input.get_pixel(x - 1, y - 1).channels()[0] as f32,
                    input.get_pixel(x - 1, y).channels()[0] as f32,
                    input.get_pixel(x - 1, y + 1).channels()[0] as f32,
                ],
                [
                    input.get_pixel(x, y - 1).channels()[0] as f32,
                    input.get_pixel(x, y).channels()[0] as f32,
                    input.get_pixel(x, y + 1).channels()[0] as f32,
                ],
                [
                    input.get_pixel(x + 1, y - 1).channels()[0] as f32,
                    input.get_pixel(x + 1, y).channels()[0] as f32,
                    input.get_pixel(x + 1, y + 1).channels()[0] as f32,
                ],
            ];

            // normalize divisor of 8.0 for Sobel
            let gradient_x = convolve(&SOBEL_KERNEL_X_MIRRORED, &pixels) / 8.0;
            let gradient_y = convolve(&SOBEL_KERNEL_Y_MIRRORED, &pixels) / 8.0;
            let magnitude = (gradient_x.powi(2) + gradient_y.powi(2)).sqrt();
            //place our pixel off by one because of crop
            result.put_pixel(x - 1, y - 1, Luma([(magnitude) as u8]));
        }
    }

    result
}
Now if we cargo run, the output should be interesting. If the runtime is a bit long, you might try cargo run --release. Running in release mode can make a massive difference.
Sucess
Extra credit
- Can you implement edge extension instead of cropping?
- Can you implement a box blur instead of the Sobel operator?
- Can you extend the command line interface to allow the user to select what filter to apply?
arguments libraries
We could polish up this binary with some better command line argument parsing, error messages, version, etc, but if you were thinking someone else has to have done this type of work before, you'd be right. Theres a helper called structopt that uses macros to annotate your existing struct.
use std::path::PathBuf;
use structopt::StructOpt;

#[derive(StructOpt, Debug)]
#[structopt(name = "training")]
struct Arguments {
    #[structopt(short = "i", long = "input", parse(from_os_str))]
    input_path: PathBuf,
    #[structopt(short = "o", long = "output", parse(from_os_str))]
    output_path: PathBuf,
}
Then not too much changes in our existing main.
fn main() {
    let arguments = Arguments::from_args();
    println!("{:?}", arguments);
}
Running cargo run -- -i valve.png -o valve_sobel.png results in
Arguments { input_path: "valve.png", output_path: "valve_sobel.png" }
and running cargo run -- --help
training 0.1.0
First Last <FirstL@gmail.com>

USAGE:
    training --input <input_path> --output <output_path>

FLAGS:
    -h, --help       Prints help information
    -V, --version    Prints version information

OPTIONS:
    -i, --input <input_path>
    -o, --output <output_path>
Code Organization & Modules
At this point, we're starting to pollute one Rust source file with a few unrelated operations and imports. Rust makes it pretty easy to refactor code into a hierarchy of modules, and sprinkle in encapsulation where appropriate.
What's a module?
A module is very similar to a C++ namespace, in that it is a named scope containing declarations of structs, enums, functions, traits, etc.
Let's take a quick look.
mod say {
    pub fn hello() {
        println!("I'm a module");
    }
}

fn main() {
    say::hello();
}
Visibility
In the simple example above, we also see pub which is a visibility specifier. By default, everything is Rust is visible within the same module, and its descendents. If we want to use a declaration outside of its module, we need to declare it as pub.
Rust also gives you some more tools for fine-grain visibility control:
pub(super): visible to containing modulepub(crate): visible to whole containing cratepub(some::path::here): visible in the specified module namespace
Ways to make a module
-
The
mod {}syntax above -
As a separate file
crate
- Cargo.toml
- src
  - lib.rs (or main.rs)
  - mymodule.rs
In lib.rs (or main.rs):
mod mymodule;
In mymodule.rs:
pub fn myfunction() {
    ...
}
- As a directory (for when your module has modules)
crate
- Cargo.toml
- src
  - lib.rs (or main.rs)
  - bigmodule
    - mod.rs
    - submodule.rs
In lib.rs (or main.rs):
mod bigmodule;
In mod.rs:
mod submodule;

fn function_in_bigmodule() {
    ...
}
In submodule.rs:
fn function_in_submodule() {
    ...
}
Let's refactor the Sobel filter program
We can refactor the Sobel filter function, convolution function, and kernels into separate modules. This way, the main module is only concerned with user input and calling out to the other modules to execute.
Re-exporting
Rust also includes a mechanism for re-exporting imported modules, functions, structs, etc from within a module. For example, our Sobel filter module could re-export GrayImage since all callers will need to use it.
pub use image::GrayImage;
You can pub use crates, whole modules, individual functions, or even sets of things (pub use some_crate::{thing1, thing2};).
Custom preludes
You probably saw in the previous chapters that to import rayon we used use rayon::prelude::*.
This a common pattern in Rust crates to create an easy way to import a group of functions, traits, etc that are commonly all used together. For example, the standard library also uses this pattern for std::io::prelude::*, which includes most functions, traits, and structs necessary for file I/O.
If we take a look at the rayon docs, you'll see exactly this pattern.
You create a prelude by creating a module, just like other modules. However, typically prelude modules consist solely of pub use statements.
mod prelude {
    pub use sobel::sobel_filter;
    pub use image::GrayImage;
}